 Divisi
How to grow groundnut
Arachis hypogaea · Fabaceae
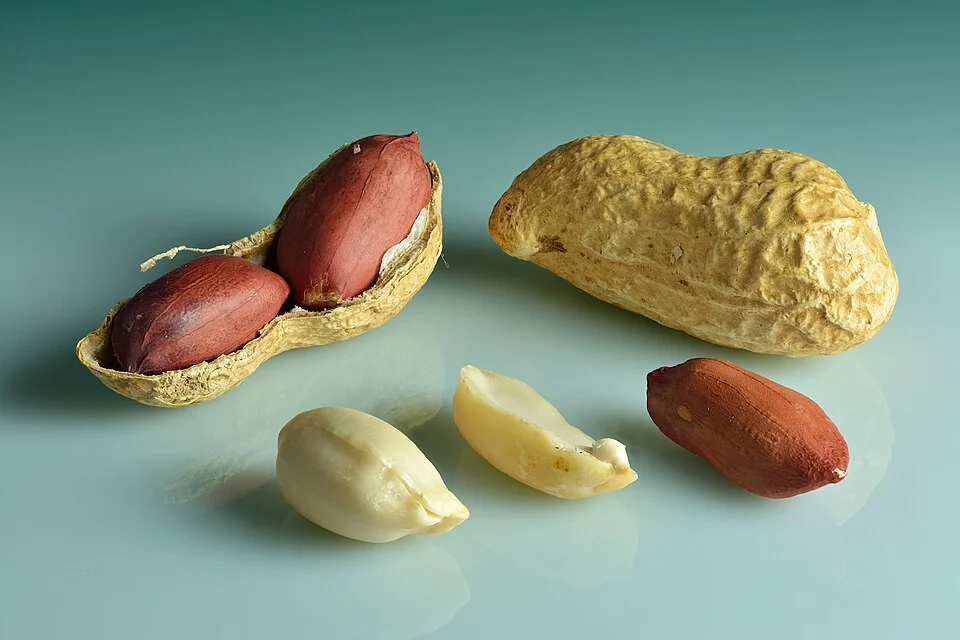
Photo: Ivar Leidus · CC BY-SA 4.0
Groundnut (peanut) is a low, leafy legume that does something no other crop in your field does: it flowers above the ground, but then each fertilised flower sends a little stalk — a peg — down into the soil, and the nut grows and fills underground. Because the plant makes its own nitrogen at its roots, it asks for very little fertiliser — but it does need loose soil the pegs can enter, calcium in the pod zone when it flowers, and above all a fast, clean dry-down after lifting, so the nuts store free of the hidden mould poison called aflatoxin. Quick-maturing Spanish/bunch types (about 90–110 days) and slower spreading Virginia/runner types (120–150 days) grow the same way — you can tell which you have by how the plant sits on the ground: a bunch type stands upright in a tight clump, while a runner type trails its stems flat and spreading over the soil. This guide is timed for a Spanish/bunch type of around 105 days.
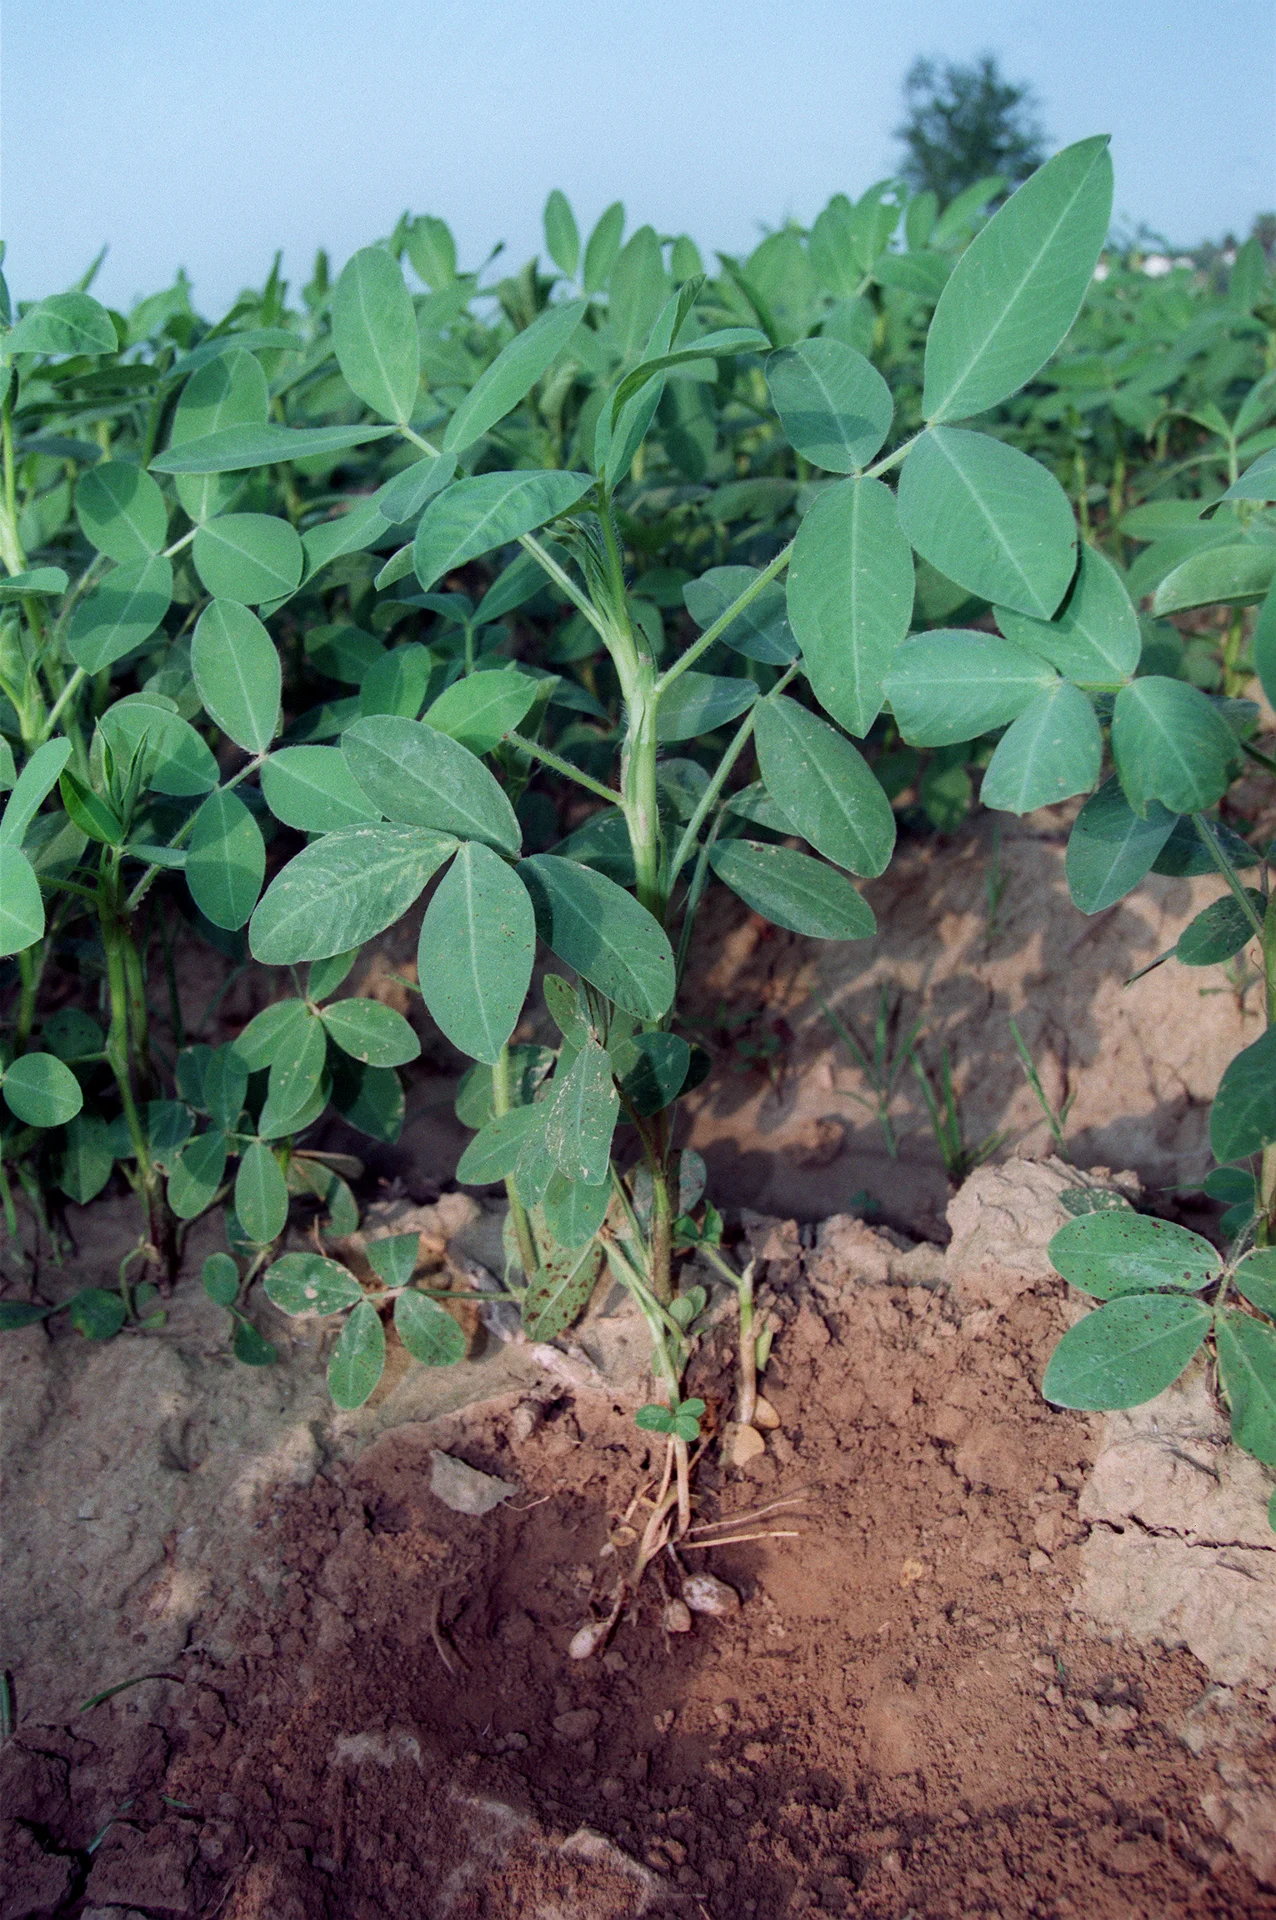
Biswarup Ganguly · CC BY 3.0 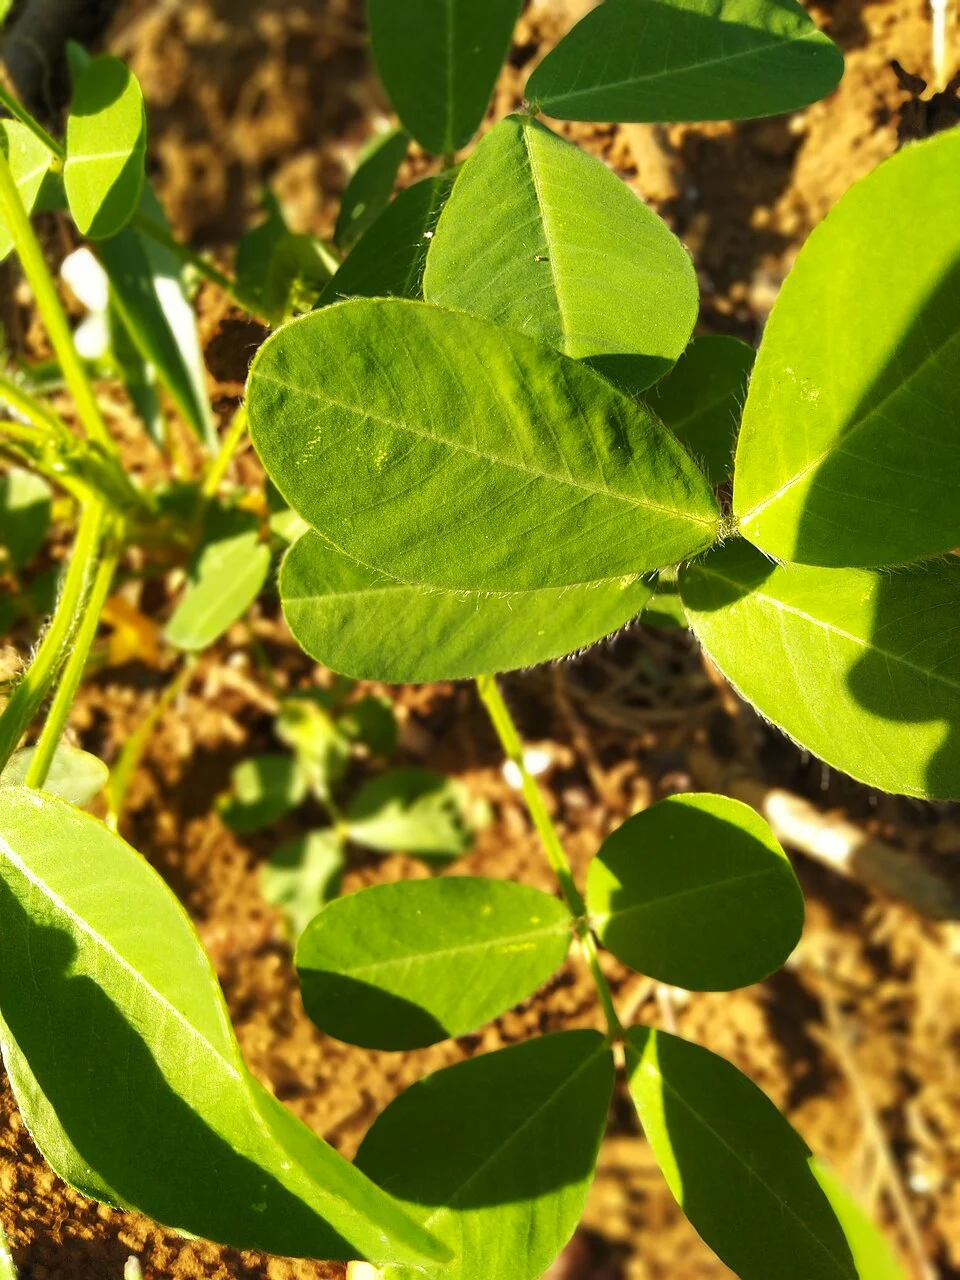
Syariful Msth · CC BY-SA 4.0
- Days to maturity
- 90–150 days
- Row spacing
- 45 cm
- Plant spacing in the row
- 9 cm
- Sowing depth
- 5–7 cm
These are general figures for the crop, compiled from published agronomic references including FAO and CABI. The right choice for your field depends on your soil, rainfall and the yield you are aiming for.
Will groundnut actually do well on your field? Check your own field against every crop in the catalogue — no signup. Run the crop check →
Also known as
Groundnut is also called peanut and monkey nut.
- English
- peanut, monkey nut
- Afrikaans
- grondboon
- Chichewa
- mtedza
- French
- arachide, pistache de terre
- Hausa
- gyada
- Portuguese
- amendoim
- Sesotho
- letokomane
- Shona
- nzungu
- Swahili
- karanga, njugu
- Yoruba
- epa
- Zulu
- intongomane
Working in buckets, bags or paces? The farming glossary turns the measures growers actually use into kilograms and hectares — what a 20 litre bucket of each crop really weighs, and how to size a field by walking it — alongside the Shona, Swahili, Ndebele and Yoruba words used in the field. Open the glossary →
Growing groundnut, stage by stage
Your groundnut season, step by step — from a deep, loose seedbed and clean seed, through planting, flowering and the pegs that carry your pods underground, to lifting and drying fast so the crop stores clean and free of aflatoxin.
Get your field and inputs ready
Groundnut is made or lost before you plant. The nut grows underground, so the soil must be deep and loose for the pegs to push in and the pods to lift out cleanly — a hard or crusting field ruins the crop. Do this in the weeks before the rains: a friable seedbed, clean well-filled seed shelled just before planting, inoculant for new land, and gypsum bought and ready for pegging.
Plan the field / rotation Recommended
Planting groundnut on the same land year after year lets leaf spot, rosette and aflatoxin moulds build up in the soil and old stubble until they hammer every crop. Following a cereal like maize or sorghum breaks those cycles and gives you a clean, healthy field to start from.
Decide this early — in the months before the rains, and settle which field you will use by about two weeks before you sow. Pick a field where groundnut — and other legumes like beans or soya — did not grow last season. Land coming out of maize, sorghum or millet is ideal, because the cereal starves the groundnut diseases that live in the soil.
Choose light, well-drained land; sandy loam is best. Avoid heavy clay and low, wet spots — there the pods rot and won't lift cleanly.
Feel the soil when it is dry. If it sets hard or forms a crust, plan to break it up well: pegs cannot push into a hard or crusting soil, so the pods never set.
Plan to shell your seed just before planting, not weeks ahead — shelled kernels lose their strength quickly and bruise easily.
- Do:
Rotate with a cereal (maize, sorghum, millet) — it breaks the leaf spot, rosette and aflatoxin cycles that build up under groundnut.
- Tip:
A hard-setting or crusting field, and low wet ground — the pegs can't enter and the pods rot or stay stuck in the soil.
- Watch out:
Land that was hit by rosette or leaf spot last year — give it a season or two under cereals before you plant nuts there again.
Buy seed + P/K basal + gypsum + inoculant Critical
Groundnut feeds itself with nitrogen, so it needs little or no N — but it does need phosphorus and potassium to start, calcium (gypsum) when it flowers, and, on new land, inoculant to fix its own nitrogen. Buy them all early: gypsum and inoculant are often hard to find, and you want everything in hand before the rains.
Buy clean, well-filled seed of a known variety — plump kernels, none shrivelled, cracked, mouldy or discoloured. Your recommendation gives the type and the seed rate for your field.
Buy it still in the shell if you can, and shell it just before planting. A bruised or split kernel rots in the ground instead of growing.
Buy the basal fertiliser (P and K) your recommendation gives. Groundnut needs phosphorus and potassium, not a nitrogen fertiliser — the plant makes its own nitrogen.
Buy gypsum (calcium sulphate) now for pegging time — you will need about 200–500 kg per hectare spread over the rows at flowering. Shops run out, so get it early.
On land that has not grown groundnut in the last few years, buy Rhizobium inoculant — the packet of living bacteria that lets the roots fix their own nitrogen. Keep it cool and out of the sun; heat kills it.
Store seed and inputs dry, off the floor, away from food, water and children, and keep every label and receipt.
- Do:
Buy gypsum and inoculant early — they sell out, and without gypsum the pods come up empty, without inoculant new land fixes no nitrogen.
- Tip:
Buying urea or other nitrogen fertiliser for the crop — groundnut fixes its own nitrogen, and heavy N just grows leaf instead of nuts.
- Watch out:
Keep the inoculant packet in the shade and use it before its expiry date — it is alive, and sun or heat kills the bacteria.
Prepare a deep, loose seedbed Critical
The whole crop grows underground, so the soil must be deep and crumbly for the pegs to push in and the pods to lift out clean at harvest. A hard, cloddy or crusting seedbed means pegs can't enter, pods stay stuck in the ground, and you leave nuts behind when you lift.
In the two to three weeks before you sow — finishing just before you plant — loosen the soil to about 15–20 cm (a spade's depth) and break it to a fine, crumbly tilth, especially the top few centimetres where the pegs will enter.
Clear out roots, stones and hard clods — each one blocks a peg and stops a pod forming.
Level the surface so water soaks in evenly and doesn't pool; groundnut hates a waterlogged pod zone.
On a slope, work across the slope, and make ridges or basins to catch the rain if your soil dries fast.
Aim for soil so loose you can push your fingers straight in — that is exactly what the pegs will need to do.
- Do:
Break the topsoil to a fine, soft tilth — the looser the top few centimetres, the more pegs enter and the more pods you lift.
- Tip:
Leaving hard clods or a smooth, crusting surface — pegs bounce off it and the pods never set.
Incorporate manure/compost Recommended
Well-rotted manure feeds the soil, helps it hold moisture through pegging and pod-fill, and keeps it loose and open for the pegs. But use it well-rotted only — fresh manure burns the crop, carries weed seeds, and pushes leafy growth at the cost of nuts.
Use only well-rotted manure or compost — dark, crumbly, no strong smell. Groundnut needs little feeding, so a modest amount is plenty.
Spread it evenly and work it into the topsoil 1–2 weeks before planting, so it settles in and keeps the soil open.
Go easy: too much manure — or any heavy nitrogen — grows big leafy bushes with few pods. The plant makes its own nitrogen.
- Tip:
Fresh manure or a heavy dose — it burns young roots, brings weed seeds, and makes leaf instead of nuts.
- Watch out:
Wash your hands after handling manure.
Plant and get a full, even stand
Now you set the stand, and the roots begin to fix their own nitrogen. Sow into warm, moist soil at the right depth and spacing, inoculating the seed on new land. Early, dense planting is your main shield against rosette — the virus disease that aphids carry — so aim for a full, even stand with no big gaps.
Inoculate + sow + basal P/K Critical
This one day sets your whole crop: the number of healthy plants you establish now is the ceiling on your harvest, and a full, dense stand is your best defence against rosette. Inoculating the seed on new land lets the roots make their own nitrogen, free, all season.
On land that hasn't grown groundnut lately, coat the shelled kernels with Rhizobium inoculant just before sowing: moisten the seed lightly, dust on the inoculant so it sticks, and plant the same day, in the shade — sun kills the bacteria.
Sow into warm, moist soil, when a planting rain has wet the ground to a spade's depth.
Open your rows about a forearm apart (≈45 cm) and drop one kernel every four fingers' width (≈7.5–10 cm) along the row. Groundnut is planted dense on purpose — a thick stand shades out weeds and escapes rosette.
Plant each kernel as deep as two finger-joints (5–7 cm) — a little deeper in dry, sandy soil, shallower in heavier soil.
Band the P/K basal in the row beside and just below the seed, never touching it — fertiliser against the kernel burns it.
Cover and firm the soil gently, and handle every kernel softly — a bruised seed rots instead of growing.
- Do:
Plant early and dense — a full, thick stand gives aphids fewer plants to land on and is your main escape from rosette.
- Tip:
Rough handling of the shelled seed — bruised kernels rot in the ground and leave gaps.
- Watch out:
Inoculated seed must go in the same day, in the shade — sun and heat kill the living bacteria before they reach the roots.
Scout (aphids/rosette, gaps) Critical
The first month decides your stand and whether rosette takes hold. Rosette is a virus that aphids carry — once a plant has it, it can't be cured — so you must pull infected plants out early and knock back the aphids before they spread it across the field.
Walk the crop twice a week, following a big W across the field so you cover the corners and the middle, not just the edge by the path.
Look for rosette: plants that are stunted and bushy, with small, crinkled, yellow or mottled (mosaic) leaves — often in patches that spread outward.
Pull out and bury or burn any rosette plants the moment you see them — they cannot recover and they feed the aphids that infect the rest.
Turn a few leaves over and look for aphids — tiny soft green or black insects clustered on the growing tips and leaf undersides. They are the carriers of rosette.
Count the gaps — stations where nothing came up — so you know whether to gap-fill in the next few days.
If aphids are building up or rosette is spreading → act now: control the aphids early and keep the stand dense. Open the rosette and aphid guides.
- Do:
Rogue out rosette plants the moment you spot them — early removal stops the virus jumping to healthy plants.
- Watch out:
Rosette often starts at the field edges and in thin, gappy patches — check those first, and keep the stand thick.
Gap-fill Recommended
Every empty station is a plant's worth of pods lost — and thin, gappy patches are exactly where aphids land and rosette starts. Filling gaps in the first two weeks keeps the stand dense, which both lifts yield and protects the crop from disease.
Within about two weeks of sowing, walk the rows and find the gaps where nothing came up.
Re-sow a fresh kernel — inoculated, on new land — into each gap while the soil is still moist and the rest of the crop is only a few days ahead.
Sow at the same depth as before, two finger-joints (5–7 cm), and firm the soil over it.
Fill sooner rather than later: a seedling that starts two weeks behind never fully catches up, but it still helps close the gap against aphids.
- Do:
Keep a little seed back at planting just for gap-filling — a dense, even stand is your cheapest defence against rosette.
- Tip:
Leaving gaps open — thin patches invite aphids and rosette and waste good land.
Irrigate until established Recommended
Newly sown groundnut has shallow roots that dry out fast. A little steady moisture now gives even emergence and a strong, uniform stand — the base for everything that follows.
If you have irrigation, keep the topsoil moist but never waterlogged until the crop is up and established — groundnut roots rot in standing water.
Water every 5–7 days, more often on sandy soil and in heat.
Check with a finger: water when the top few centimetres are dry.
Once the stand is up and growing, ease back — the young crop needs far less water than it will at flowering.
- Tip:
Waterlogging — soggy soil rots the seed and the young roots. Drain any low, wet spots.
Grow the canopy — and finish weeding before pegging
The plant builds its leaves and root nodules before it flowers. This is your window to weed: do the main weeding now, and shallow, because once the pegs start going down you can no longer hoe without breaking them. Keep scouting for aphids, rosette and the first leaf spots.
Scout (leaf spot, rosette, thrips) Critical
As the canopy builds, leaf spot and rosette can rob the leaves that will feed your pods, and this is your last easy chance to weed. Catching problems now — while you can still walk the rows and hoe — protects the whole pod-fill to come.
Twice a week, walk the W and check plants at several stops across the field.
Look on the lower, older leaves for leaf spot — small dark brown or black spots, sometimes ringed with yellow. It starts low and climbs, and heavy spotting strips the leaves early.
Keep watching for rosette — stunted, bushy, yellow or mottled plants — and pull out any you find.
Check the growing tips for thrips and aphids — tiny insects that scar the young leaves and carry virus.
Note where problems are worst so you can act. If leaf spot is climbing up the plants or rosette is appearing → act: open the matching guide.
- Do:
Do your main weeding now, shallow — once pegging starts you cannot weed deeply without breaking the pegs.
- Tip:
Ridging or throwing soil over the crown — it buries the flowering zone and smothers the crop.
Weeding (finish before pegging) Critical
Weeds steal water, light and nutrients while groundnut is still small and open — and this is the last time you can weed properly. Once the plant starts sending pegs down, hoeing breaks them and destroys pods, so the field must be clean before pegging begins.
Weed by about 3–4 weeks after sowing, before the weeds get bigger than the crop and before the first flowers open.
Hoe shallow, or hand-pull close to the plants — deep hoeing cuts the groundnut's own roots and nitrogen nodules.
Get the field fully clean now: this is your main weeding, because after pegging you can only hand-pull gently.
Do not ridge or throw soil over the crowns. Groundnut flowers and pegs at the base of the plant — burying it smothers the pods before they can form.
Leave the pulled weeds lying between the rows as a light mulch to hold moisture.
- Do:
Finish the main weeding before the first flowers open — a clean field now saves the pegs later.
- Tip:
Earthing-up or ridging like you would for maize — for groundnut it buries the very zone where the pods form.
Irrigate Recommended
Steady moisture through vegetative growth builds the leafy frame and the root nodules that will feed your pods. The crop isn't at its thirstiest yet, but don't let it wilt — a stressed plant flowers poorly.
If irrigating, water every 7–12 days through this stage, depending on heat and soil.
Keep the soil evenly moist, but let the surface breathe between waterings — groundnut dislikes constant wet feet.
Don't let the crop wilt hard in the run-up to flowering; the number of flowers now sets the number of pods to come.
- Watch out:
Ease toward steadier moisture as flowering nears — the thirsty pegging and pod-fill stages are just ahead.
Flowering and pegging — the pods form now
Small yellow flowers open low on the plant, and after each is fertilised a peg grows down and pushes into the soil to start a pod. This stage sets how many pods you get, and the pod zone needs calcium now. Spread gypsum over the rows at early flowering, keep the soil moist, and weed only gently by hand — low pod-zone calcium or a broken peg means empty shells.
Apply gypsum (calcium) Critical
As the pegs enter the soil, the forming pods pull calcium straight from the soil around them, not from the roots. Without calcium right there in the pod zone you get lots of empty shells and "pops" — pods with no kernel. Gypsum at early flowering is what fills the nuts.
Apply at early flowering — when the first yellow flowers are opening low on the plants (around 4–6 weeks after sowing) — so the calcium is in place as the pegs go down.
Broadcast 200–500 kg per hectare of gypsum (calcium sulphate) in a band over the rows, like sprinkling ash along the plants, so it lands in the top few centimetres where the pegs enter.
Aim the gypsum over the plant zone, not into the bare middle between rows — the pods form under and beside the plant.
Keep the pod zone moist after applying, so the calcium is available as the pods set.
If you truly cannot get gypsum, well-crushed lime worked into the topsoil before flowering supplies some calcium — but plan ahead and get gypsum, it is the proven fix.
- Do:
Spread gypsum over the rows at early flowering — that is the exact time and place the pods need calcium.
- Tip:
Waiting until the pods are already forming — calcium given too late can't fill shells that have already set empty.
- Watch out:
Wash your hands after handling gypsum, keep it out of your eyes, and keep it away from food, water and children.
Scout (leaf spot, pod damage starting) Critical
Flowering and pegging is when leaf spot and rust hit hardest — and healthy leaves are exactly what fill the pods now forming. Losing the canopy here means small, poorly-filled nuts, so keep the leaves green and working.
Twice a week, check the leaves across the field, paying attention to the lower and middle leaves.
Leaf spot: small dark brown-to-black spots, often ringed with yellow, spreading up from the older leaves; bad attacks make leaves yellow and drop.
Rust: reddish-brown, powdery pustules on the underside of the leaves that rub off orange on your finger.
Watch that the crop stays green and leafy right through pegging — early leaf loss now directly shrinks the nuts.
If leaf spot or rust is climbing up the plants → act: open the leaf spot / rust guide and protect the canopy.
- Watch out:
Keep the pods' leaf factory alive — heavy leaf spot or rust at flowering steals the very stage that fills your nuts.
Shallow hand-weeding only Recommended
Weeds still compete during pegging, but the pegs are now diving into the soil — so any deep hoeing breaks the pegs and destroys pods. From here on, weeding is gentle hand-pulling only.
Walk the rows and hand-pull the weeds you can reach, close to the plants.
Pull gently and straight up, so you don't tear out the pegs that are entering the soil.
Throw no soil over the crowns and do not hoe deep — a broken peg is a lost pod.
Leave the pulled weeds lying between the rows as mulch to hold moisture in the pod zone.
- Tip:
Any hoeing or ridging now — once the pegs are down, only careful hand-pulling is safe.
Irrigate through pegging & pod-set Critical
Pegging and pod-set is one of the thirstiest, most sensitive stages: the pegs must enter moist, soft soil to set pods, and dry soil now means far fewer nuts. If you can water at only a few times all season, water now.
Keep the soil evenly moist right through flowering and pegging — never let the pod zone bake into a hard crust.
Water every 5–7 days, more often in heat, so the pegs can push into soft, damp soil and set pods.
Don't let the crop wilt during pegging — a dry spell here cuts pod number more than at almost any other time.
Moist soil also carries the calcium from your gypsum down into the forming pods.
- Watch out:
A hard, dry crust at pegging stops the pegs entering — keep the top few centimetres soft and moist.
- Do:
If water is short, save it for pegging and pod-fill — these two stages decide your yield.
Fill the pods and keep aflatoxin out
The pods and kernels fill and ripen underground. The big danger now is aflatoxin — a hidden mould poison — and its main triggers are end-season drought and pod damage from termites. Keep moisture steady into maturity, watch for termites, and get ready to lift on time: leaving the crop too long lets the pods break off and stay in the soil.
Scout (pod termites, maturity) Recommended
Late in the season, termites bore into the pods underground, and any pod damage or drought stress opens the door to aflatoxin. Checking now — and knowing when the pods are mature — lets you protect the crop and lift it at the right moment.
Walk the field about once a week (every 5–7 days) and look for wilting or dying patches, and for termite runways — thin soil tunnels up the stems — which warn of pods being bored below.
Lift a few plants from different spots and check the pods for holes, tunnelling or empty bored shells (termites), and for any mould or dark staining.
Also look over the leaves: leaf spot — small dark brown-to-black spots, often ringed with yellow — can still strip the canopy this late, and every green leaf you keep helps fill the pods.
Feel whether the crop is drying, and check maturity (see the maturity check) so you can plan lifting — over-mature pods snap off and stay in the soil.
Keep the soil from drying out hard — end-season drought is a main driver of aflatoxin.
If termites are tunnelling the pods or leaf spot is stripping the canopy → act: open the matching guide, and if the damage is spreading, lift as soon as the pods read mature rather than wait.
- Watch out:
End-season drought and termite damage are what drive aflatoxin — keep moisture steady and lift on time to keep the nuts clean and safe to eat and sell.
Irrigate — keep steady to near maturity Critical
The kernels gain their weight now, and — just as important — a crop that dries out late is a crop that grows aflatoxin. Keeping water steady into near-maturity both fills the nuts and keeps the hidden poison out.
Keep the soil evenly moist through pod-fill, watering every 7–10 days while the crop is still green and filling.
Never let the crop dry-stress late — a drought right before harvest is the single biggest trigger of aflatoxin in the pods.
As the crop reaches maturity (leaves yellowing, pods hard inside), ease off gently so the crop and pods can dry down for lifting — but don't slam it from wet to bone-dry.
- Do:
If you must choose where to spend late-season water, keep pod-fill steady — dry pods at the end mean aflatoxin.
- Tip:
A sudden hard dry-out near maturity — steady moisture then a gentle taper keeps the nuts clean.
Check maturity Critical
Groundnut ripens out of sight, underground, so you can't judge it from the tops alone. Lifting a few plants to read the pods tells you whether to harvest: lift too early and the nuts are small and light; lift too late and the pegs weaken so pods break off and stay lost in the soil.
From about 95 days after sowing (for a Spanish/bunch type), lift 2–3 whole plants from different parts of the field.
Crack open several of the biggest pods and look inside the shell: a mature pod has a hard shell with dark brown to blackish veined patterning on the inside wall.
Check the kernels: a mature nut fills the shell and the papery skin has its full colour for your variety, not white and watery.
When most of the big pods read mature like this, the crop is ready — plan to lift within a few days.
If the pods are still pale and soft inside → wait and check again in about a week; but don't wait for the tops to die right back, or over-mature pods will break off in the soil.
- Do:
Judge maturity from the inside of the pods, not from the leaves — the crop ripens underground.
- Watch out:
Lift on time — waiting too long weakens the pegs and you lose pods in the ground when you pull.
Lift and cure (dry fast to beat aflatoxin)
Get the whole crop out of the ground cleanly and start it drying fast. Loosen the soil first so the pods lift with the plant instead of staying behind, then stack the plants inverted, pods up, to cure in the air. Rapid drying right after lifting is the single biggest defence against aflatoxin.
Lift the whole plant + windrow to cure Critical
How you lift and dry decides both how many pods you keep and whether the crop grows aflatoxin. Pull without loosening and you leave pods behind in the soil; pile the plants in a damp heap and the nuts mould. Lifting clean and curing fast in the air protects the whole harvest.
First loosen the soil under the rows with a fork or hoe, and lever gently so the roots let go and the pods come up with the plant instead of snapping off underground.
Pull whole plants, shake off the loose soil, and check that the pods are still attached.
Lay the plants in windrows — long rows with the pods facing up — off the wet ground, so air moves through and the pods dry evenly.
Cure them like this in the air for a few days, until the pods are drying and the plants are wilting; this fast start is your biggest aflatoxin defence.
Lift in dry weather if you can, and never leave lifted plants in a damp heap — that is exactly how mould and aflatoxin begin.
- Do:
Loosen the soil first, then windrow pods-up — clean lifting keeps the pods, and fast air-drying keeps out aflatoxin.
- Tip:
Heaping the pulled plants wet, or drying them pods-down on the soil — both trap moisture and grow mould.
- Watch out:
Don't wait for the plants to die right back before lifting — over-mature pegs snap and the pods stay in the ground.
Dry, shell and store — aflatoxin-safe
The crop is grown — now don't poison it. Groundnut stored damp grows aflatoxin, a hidden mould poison that harms your family and gets your nuts rejected at market. Dry the pods hard and fast on a clean raised surface, shell gently, sort out every bad kernel, and store the clean, dry nuts sealed and off the ground.
Dry fast, shell gently, sort & store Critical
This last step decides whether your harvest is food and income or a health risk. Damp nuts, a dirty drying floor, or a few mouldy kernels left in the bag all breed aflatoxin. Drying hard, sorting ruthlessly, and sealing the store is how you keep the crop clean, whole and sellable.
Dry the pods on a clean raised surface, mat or tarpaulin — never on bare soil and never in a damp heap. Bare ground pushes moisture and mould straight back into the pods.
Turn the pods so they dry evenly, and cover them if rain threatens.
Dry until the nuts are hard: the kernels rattle in the shell and a kernel snaps rather than bends (about 8–10% moisture).
Shell gently once fully dry — bruising cracks the skins and lets mould in.
Sort out every shrivelled, discoloured, insect-damaged or mouldy kernel — these are the ones that carry aflatoxin. When in doubt, throw it out; never eat or sell the mouldy ones.
Store the clean, dry kernels (or unshelled pods) in clean sealed bags, off the ground, in a cool, dry, airy place, and check now and then for damp, mould or bruchids (small beetles boring the kernels).
If the nuts still bend instead of snapping → they are too wet to store: dry them more before bagging, or they will mould in storage.
- Tip:
Drying on bare soil or storing in a damp heap, and keeping any mouldy or damaged kernels — these are exactly what carry aflatoxin.
- Do:
Sort hard at shelling — pull out every discoloured, shrivelled or mouldy nut; one bad handful can taint the whole bag.
- Watch out:
Check stored nuts for bruchid beetles and any damp, musty smell — re-dry and re-sort at the first sign.
Pests and diseases that attack groundnut
-
 Bacterial wilt
 -
 Bruchids (bean and cowpea weevils)
 -
 Charcoal rot
 -
 Collar rot
 -
 Cowpea aphid
 -
 Grasshoppers
 -
 Groundnut leaf spot
 -
 Groundnut rosette disease
 -
 Groundnut rust
 -
 Jassids (leafhoppers)
 -
 Leaf spot
 -
 Phyllody
 -
 Rodents
 -
 Root rot
 -
 Rust
Rust -
 Termites
 -
 White grubs
Where to sell groundnut
Markets that trade this crop — what each one sells it by, when supply peaks there, and the currency used.
-
 Dawanau International Grains Market
-
 Mbare Musika
-
 Grand Marché de Bamako
-
 Grand Marché de Kinshasa
-
 Kibaigwa Maize Market
-
 Konkomba Yam Market
-
 Marché Mokolo
-
 New Soweto Market
Grow groundnut with a plan, not a guess
This guide is the general answer. Divisi works out yours — the week to plant groundnut on your soil and your rainfall, and each job dated for your field.


When to plant groundnut, country by country
- When to plant groundnut in Algeria
- When to plant groundnut in Angola
- When to plant groundnut in Benin
- When to plant groundnut in Botswana
- When to plant groundnut in Burkina Faso
- When to plant groundnut in Burundi
- When to plant groundnut in Cabo Verde
- When to plant groundnut in Cameroon
- When to plant groundnut in Comores
- When to plant groundnut in Congo
- When to plant groundnut in Côte d'Ivoire
- When to plant groundnut in Egypt
- When to plant groundnut in Eritrea
- When to plant groundnut in Eswatini
- When to plant groundnut in Ethiopia
- When to plant groundnut in Gabon
- When to plant groundnut in Gambia
- When to plant groundnut in Ghana
- When to plant groundnut in Guinea Ecuatorial
- When to plant groundnut in Guinea-Bissau
- When to plant groundnut in Guinée
- When to plant groundnut in Kenya
- When to plant groundnut in Lesotho
- When to plant groundnut in Liberia
- When to plant groundnut in Libya
- When to plant groundnut in Madagascar
- When to plant groundnut in Malawi
- When to plant groundnut in Mali
- When to plant groundnut in Mauritanie
- When to plant groundnut in Mauritius
- When to plant groundnut in Morocco
- When to plant groundnut in Moçambique
- When to plant groundnut in Namibia
- When to plant groundnut in Niger
- When to plant groundnut in Nigeria
- When to plant groundnut in Rwanda
- When to plant groundnut in République centrafricaine
- When to plant groundnut in République démocratique du Congo
- When to plant groundnut in Sao Tome and Principe
- When to plant groundnut in Seychelles
- When to plant groundnut in Sierra Leone
- When to plant groundnut in Somalia
- When to plant groundnut in South Africa
- When to plant groundnut in South Sudan
- When to plant groundnut in Sudan
- When to plant groundnut in Sénégal
- When to plant groundnut in Tchad
- When to plant groundnut in Togo
- When to plant groundnut in Tunisie
- When to plant groundnut in Uganda
- When to plant groundnut in United Republic of Tanzania
- When to plant groundnut in Zambia
- When to plant groundnut in Zimbabwe
Where groundnut scores best
Districts where Divisi's engine currently rates this crop highest, ranked by fit.


Get Insights by email
A short digest of new Divisi articles. No email on quiet weeks.
Frequently asked questions
How do I grow groundnut?
How to grow groundnut: 90–150 days to maturity, 45 cm rows, 5–7 cm deep. Also called peanut, grondboon, mtedza, arachide, gyada, amendoim, letokomane.
What is grondboon in English?
Grondboon is the Afrikaans name for groundnut.
What is mtedza in English?
Mtedza is the Chichewa name for groundnut.
What is arachide in English?
Arachide (also pistache de terre) is the French name for groundnut.
What is gyada in English?
Gyada is the Hausa name for groundnut.
What is amendoim in English?
Amendoim is the Portuguese name for groundnut.
What is letokomane in English?
Letokomane is the Sesotho name for groundnut.
What is nzungu in English?
Nzungu is the Shona name for groundnut.
What is karanga in English?
Karanga (also njugu) is the Swahili name for groundnut.
What is epa in English?
Epa is the Yoruba name for groundnut.
What is intongomane in English?
Intongomane is the Zulu name for groundnut.
How long does groundnut take to grow?
Groundnut takes about 90–150 days from sowing to maturity, though the exact length varies with variety, temperature and how the season runs.
What spacing should I use for groundnut?
Space groundnut rows about 45 cm apart, with roughly 9 cm between plants within the row.
How deep should groundnut be planted?
Sow groundnut at about 5–7 cm deep. Shallower risks drying out; deeper wastes seed energy before the shoot reaches light.
What pests and diseases attack groundnut?
The ones covered in this guide are Bacterial wilt, Bruchids (bean and cowpea weevils), Charcoal rot. Each has its own page explaining how to identify, check for and control it.