 Divisi
How to grow common bean
Phaseolus vulgaris · Fabaceae
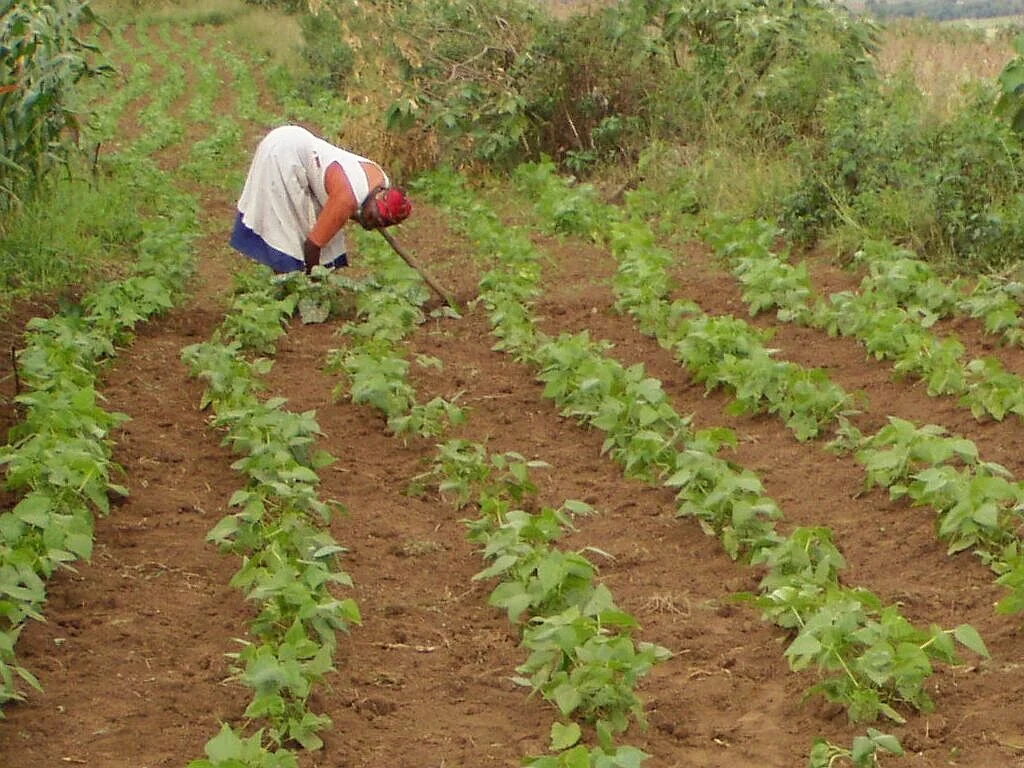
Photo: Alandmanson · CC0
The common bean is the number-one grain legume that people in East and Southern Africa eat straight from the pot — as dry beans (a pulse) or as fresh green/snap pods. It is a cool-weather crop that hates heat: when days climb above 30 °C or nights stay above 20 °C it drops its flowers, so the planting date is chosen to bring flowering into cool weather. Unlike a cereal, the bean makes much of its own nitrogen from the air through nodules on its roots, so it needs little nitrogen fertiliser — mainly phosphorus, plus lime where the soil is sour. It comes in two habits — quick, self-supporting bush beans and higher-yielding climbing beans that need stakes — and its seed carries several of its own diseases, which is why clean, certified seed matters so much.
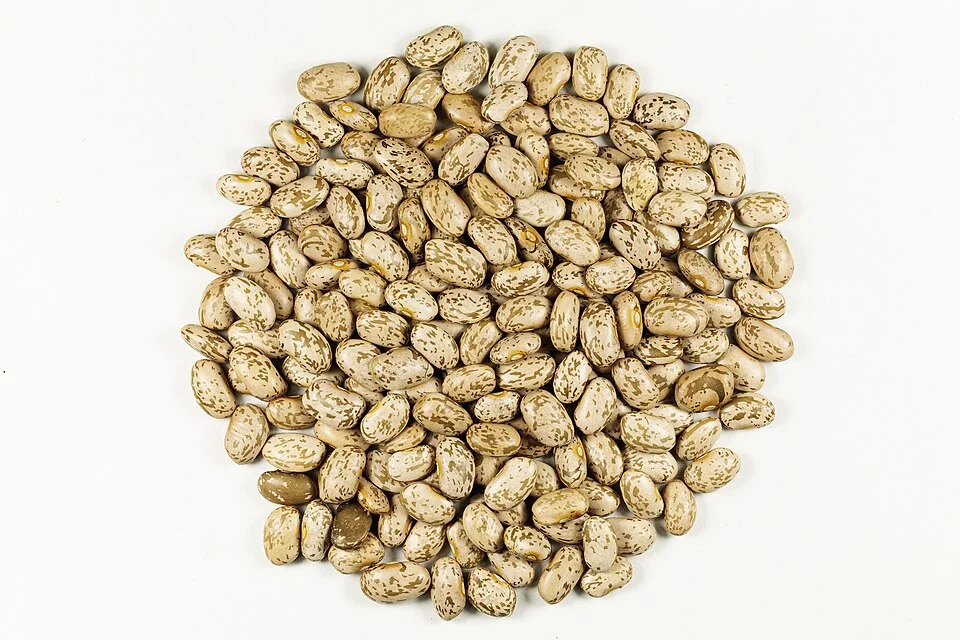
Sanjay Acharya · CC BY-SA 4.0 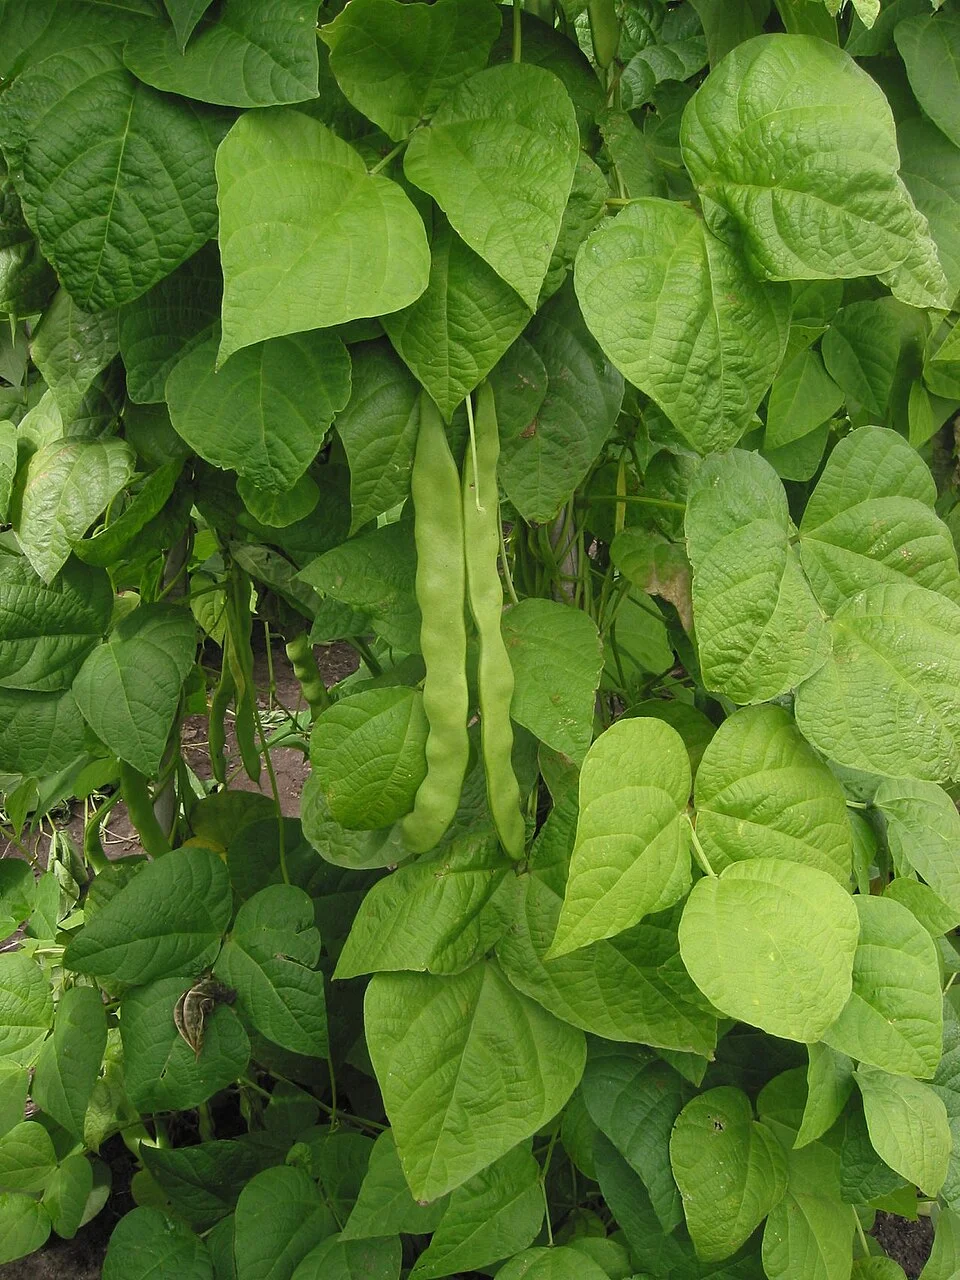
Rasbak · CC BY-SA 3.0
- Days to maturity
- 75–120 days
- Row spacing
- 50 cm
- Plant spacing in the row
- 10 cm
- Sowing depth
- 5–7 cm
These are general figures for the crop, compiled from published agronomic references including FAO and CABI. The right choice for your field depends on your soil, rainfall and the yield you are aiming for.
Will common bean actually do well on your field? Check your own field against every crop in the catalogue — no signup. Run the crop check →
Also known as
Common bean is also called dry bean, sugar bean, French bean, snap bean and kidney bean.
- English
- dry bean, sugar bean, French bean, snap bean, kidney bean
- Afrikaans
- boontjies
- Amharic
- boloqe
- Chichewa
- nyemba
- French
- haricot
- Kinyarwanda
- ibishyimbo
- Ndebele
- ibhontshisi
- Portuguese
- feijão
- Sesotho
- nawa, dinawa
- Setswana
- dinawa
- Shona
- bhinzi
- Swahili
- maharage, maharagwe
- Xhosa
- imbotyi, iimbotyi
- Zulu
- ubhontshisi
Working in buckets, bags or paces? The farming glossary turns the measures growers actually use into kilograms and hectares — what a 20 litre bucket of each crop really weighs, and how to size a field by walking it — alongside the Shona, Swahili, Ndebele and Yoruba words used in the field. Open the glossary →
Growing common bean, stage by stage
Your bean season from soil to store — sweeten sour soil and start with clean seed, plant so the flowers open in cool weather, keep the crop weeded and evenly watered through its two thirsty windows (flowering and pod-fill), then dry the grain hard and seal it airtight against weevils.
Get your field, soil and seed ready
Beans are a short, quick crop, but almost everything that decides the harvest is set before you plant: a field that hasn't grown beans recently, sweet (not sour) soil with enough phosphorus, and clean, disease-free seed. Get it all ready in the weeks before the rains so you can plant on the first good planting rain — and time it so the flowers open in cool weather, not the heat.
Plan the field / rotation Recommended
Many of the worst bean troubles — root rots, anthracnose, bacterial blights and bean fly — live on in the soil and in old bean stalks. Plant beans after beans (or after other legumes) on the same land and you feed those problems, so they hit harder every year. A 2–3-year break on that land starves them out. And because beans drop their flowers in heat, choosing when to plant is part of planning the field.
Pick a field where you have not grown beans, peas, groundnuts or other legumes for 2–3 years — many bean diseases survive in the soil and on old bean trash. Land that grew maize or another cereal last is a good choice.
Choose land that drains well — beans hate wet feet and rot quickly where water sits after rain. Avoid the low, soggy corners of the field.
Clear out and dig in old bean stalks and pods from earlier crops; don't leave them lying around, as they carry disease straight into the new crop.
Plan your planting date so the crop flowers in cool weather. Count forward: beans flower about 4–6 weeks after planting, and flowers drop when days go above 30 °C or nights above 20 °C — so don't plant so that flowering lands in the hottest, driest spell.
- Tip:
Planting so flowering hits hot weather — a day above 30 °C or a night above 20 °C drops the flowers, and you can lose more than half your pods. The warm night is the worse of the two.
- Do:
Follow your beans with a cereal like maize next season — the beans leave nitrogen behind for it, and the change of crop breaks the disease cycle.
- Watch out:
Steer clear of a low, water-logging corner — bean roots rot fast in soggy soil, faster than most crops.
Apply lime (+ P) on acid soils Critical
In much of the East African highlands the soil is sour (acid), and sour soil is the single biggest thing holding bean yields down. In sour soil the roots are poisoned by aluminium and can't reach the phosphorus, so the plants stay small and yellow no matter what you feed them. Sweetening the soil with lime, together with phosphorus (P), is worth 30–40% more beans — the biggest single gain you can make. Lime works slowly, so it must go on weeks before you plant.
Only lime if your soil is sour — a soil test says so, or past crops on that land stayed small, yellow and stunted even when you fed them. Your recommendation gives the amount for your field.
Spread the lime evenly over the whole field, like sprinkling flour by hand — patches give you patchy beans.
Work it into the topsoil with a hoe or plough. Lime only sweetens the soil it is mixed into; left lying on top it does almost nothing.
Do it 2 weeks to 2 months before planting — lime is slow, so late liming won't help this crop. Put the phosphorus (P) on with the lime, because P is exactly what the sweetened soil now lets the roots reach.
- Watch out:
Keep the lime dust out of your eyes and nose, and wash your hands after handling it.
- Do:
Spread lime and manure a couple of weeks apart, not on the same day — give each time to work in.
- Tip:
Skipping the phosphorus — on sour soils lime and P work as a pair, and lime alone leaves the crop still short of P.
Buy clean/certified seed + basal (N-starter + P) Critical
Beans carry many of their diseases inside the seed itself — mosaic virus, anthracnose, blights. One bag of cheap, dirty seed can plant a diseased crop from day one, and no spray will cure it. Clean, certified seed starts you disease-free. Buy it early, before the rains, along with a little starter fertiliser — beans make most of their own nitrogen from the air, so they need only a small starter of nitrogen plus phosphorus (P), the nutrient beans really respond to.
Buy certified bean seed from a registered dealer — a sealed, labelled bag with the variety name and this season's packing date. Certified seed is graded free of the seed-borne diseases that ordinary grain-beans carry.
Choose the habit that suits you: bush beans are quick and need no stakes; climbing beans yield far more but need stakes and a longer season. Ask the dealer or check your recommendation.
Buy only a little basal fertiliser — a small starter of nitrogen plus phosphorus (P) (a compound fertiliser, or DAP — di-ammonium phosphate), just the amount in your recommendation. Beans fix their own nitrogen, so they need far less than a cereal like maize — don't over-buy nitrogen.
Where bean fly bites hard, ask for insecticide-dressed seed (or a seed dressing) — it guards the seedling through the first few dangerous weeks.
Store seed and fertiliser dry, off the floor, away from food, water and children. Keep the label and receipt in case the seed turns out poor.
- Do:
Ask specifically for bean-fly-dressed seed if bean fly is known in your area — it is the cheapest protection you can buy.
- Tip:
Buying a big bag of high-nitrogen fertiliser for beans — the bean feeds itself nitrogen through its roots, and too much fertiliser nitrogen gives leafy plants with few pods.
- Watch out:
Keep the seed dry until planting; damp seed moulds and loses the sprout, and damp fertiliser sets hard like a rock and won't spread.
Gather stakes (climbers) Optional
Climbing beans yield two to four times more than bush beans — but only if they have something to climb. A vine left to sprawl on the ground sets far fewer pods, and those pods rot and are eaten by pests in the wet soil. Gather your stakes before you plant, because once the vines start reaching (about two weeks after planting) it is already time to put them in. (Skip this task entirely if you are growing bush beans.)
If you are growing climbing beans, collect one strong 2–3 m stake per hill — straight poles, tall grass stems or cut branches all work.
No stakes to spare? Set up strings or a trellis instead: firm posts at the row ends with lines run between them for the vines to climb.
Have them ready before planting, so you can stake the moment the vines begin to twine (about 15–20 days after planting), before they flop onto the ground.
Bush beans need no stakes — skip this if that is what you planted.
- Do:
Cut and stack your stakes while you clear the field, so they're on hand right at planting.
- Watch out:
Weak or short stakes collapse under a loaded vine in wind — choose strong ones a good 2 m or taller.
Incorporate manure/compost Recommended
Well-rotted manure or compost feeds the soil slowly, helps it hold water through the dry spells beans fear, and makes your bought phosphorus work harder. But fresh manure burns young roots and carries weed seeds — it must be well rotted first.
Use only well-rotted manure or compost — dark, crumbly, no strong smell. Fresh, strawy manure needs more time to break down first.
Spread it evenly over the field — about a wheelbarrow every few strides is a good rate.
Work it into the topsoil 1–2 weeks before planting, so it settles in with the soil before the seed goes down.
- Tip:
Fresh or raw manure at planting — it scorches the young roots, steals nitrogen as it rots, and brings in weed seeds.
- Watch out:
Wash your hands after handling manure.
Plant and set a full stand
The number of healthy seedlings you get up now is the ceiling on your harvest — you can't add plants later. This is also when bean fly strikes: its tiny maggots tunnel into the stem base of young plants and can kill them in the first 4–5 weeks. Plant at the right depth and spacing, use dressed seed where bean fly bites, keep the soil evenly moist, and earth up the survivors so they grow away from the damage.
Sow (dressed seed) + basal Critical
A full, even stand is the single biggest thing you control — and you can't add plants later. Getting the depth, spacing and seed placement right here, on good moisture, gives even emergence and sets up the whole crop. Beans are big seeds that push their seed-leaves up through the soil, so depth and a firm, moist bed really matter.
Plant into moist soil — a real planting rain that wets the ground a hand deep — so the seeds come up together and evenly.
Open your holes at the right spacing for your habit: bush beans about 50 cm between rows and 10 cm along the row (a hand-width apart); climbing beans about 60 cm between rows and 20 cm along the row (two hand-widths apart).
Drop two seeds per hole, about 5–7 cm deep — a finger pushed in to the second knuckle. A little deeper in dry, sandy soil; shallower in heavy, wet soil.
Put the basal (the little starter of nitrogen + phosphorus) in the hole beside the seed, with a pinch of soil between the fertiliser and the seed so they don't touch and burn the sprout. Use dressed seed in bean-fly areas.
Cover and firm the soil over seed and basal, so the seed sits snugly in moist earth and comes up strongly.
- Do:
Plant on a real planting rain that soaks a hand deep — a false start on a light shower leaves seed to rot or bake.
- Tip:
Planting too shallow on the surface — birds take the big seeds and the crop comes up thin and patchy.
- Watch out:
Keep the starter fertiliser from touching the seed directly, and wash your hands after handling it.
Scout (bean fly, aphids, gaps) Critical
The first month decides your stand, and bean fly is the killer. Its maggots tunnel down inside the stem base, and the young plant wilts, yellows and dies — once they're inside, no spray reaches them. Catching it in the first two weeks, while the seedlings are at the 2–3-leaf stage, is the only time you can act. Ten minutes, twice a week, protects the whole crop.
Walk the crop twice a week from the day it comes up, looking closely at young seedlings across the whole field — not just the edge by the path.
Bean fly: look for seedlings that yellow, wilt and stay small, with the stem base swollen or cracked; split a dying stem and you'll find a tiny maggot or brown tunnel inside. Act if you see 3–5 dying plants close together, or 3–4 small black flies to a stride-square (m²), around the 2–3-leaf stage — open the bean-fly guide.
Damping-off: look for seedlings that flop over and rot at the soil line, often in wet patches. Improve drainage and don't replant into the same soggy spot.
Mosaic virus (BCMV — bean common mosaic virus): look for leaves that are mottled yellow-and-green, puckered or curled. Pull out and remove badly-affected plants so aphids don't spread it further.
Count the gaps (holes with no plant) as you walk, so you know whether to gap-fill.
- Do:
Act on bean fly early, at the 2–3-leaf stage — once the maggot is deep in the stem, sprays no longer reach it.
- Watch out:
Fresh wilting with a swollen stem base means bean fly is still working; earthing up the survivors (next task) helps them root above the damage.
Check emergence Critical
A thin or patchy stand caps your yield before the crop even gets going — but you can still fix small gaps in the first two weeks, while a re-sown seed can still catch up. After that it's too late, so check now. Beans grow fast, so don't delay.
About 7–12 days after planting, once the seedlings are up, walk the rows and count how many plants came up against the number of holes you sowed.
Work out the share that came up — for example, 85 plants from 100 holes = 85%.
85% or more → a good stand, carry on.
Below 85% → gap-fill the biggest gaps in the next few days, while the soil is still moist and the crop is only days old (re-sow two seeds per empty hole).
If it fails (gaps stay empty and the stand is thin): re-sow the gaps at once, and if a whole patch failed, work out why — bean fly, rot, poor seed or a hard crust — before it happens again.
- Do:
Check within the first two weeks — gaps caught now can be filled; later, re-sown plants are too far behind to catch up.
- Watch out:
A sudden thin stand with wilted, tunnelled stems points to bean fly — treat the survivors, not just the gaps.
Earth up seedlings Recommended
When bean fly has tunnelled the stem base, drawing soil up around the stem lets the plant grow fresh roots above the damage and carry on instead of dying. It's a simple, free way to save seedlings the maggot has already hit — and it steadies the young plants and buries small weeds too.
About 10–14 days after planting (the seedlings now have a few true leaves), draw a little loose soil up around the base of each stem with your hoe, like a small mound.
Cover the swollen, damaged part of the stem base — new roots will grow from the buried stem, above where the maggot fed.
Do it gently so you don't cut the shallow roots or bury the growing tip.
- Do:
Earth up soon after you spot bean-fly damage — the sooner the plant roots above the tunnel, the better it recovers.
- Watch out:
Keep the soil off the leaves and growing point; you're mounding the stem, not burying the plant.
Irrigate Recommended
Young bean roots are shallow and dry out fast. Steady moisture now gives even emergence and a strong, uniform start — but beans also rot in soggy soil, so keep it moist, never waterlogged.
Keep the topsoil moist but not wet — check by pushing a finger in, and water when it's dry a finger-deep.
Water every 5–7 days, more often in heat and on sandy soils that dry fast.
Water gently at the base, not a hard flood — beans are easily waterlogged, and standing water rots the young roots.
- Tip:
Letting water stand in the field — bean roots rot quickly in waterlogged soil. Drain the low spots.
- Watch out:
In cool, damp weather ease off — over-watering seedlings invites damping-off.
Grow the frame — weed early, stake climbers
Now the plant builds its leaves and (climbers) starts to reach and twine. Two things matter most: keep it weed-free through the first 4–5 weeks — beans are weak against weeds and lose out fast — and stake climbers before the vines flop. Watch too for aphids, whitefly and the first leaf diseases as the canopy fills.
Scout (aphids, whitefly, foliar disease) Recommended
As the leaves fill out, aphids, whitefly and leaf diseases move in. Aphids and whitefly don't just suck sap — they spread mosaic virus from plant to plant. Leaf spots and rust eat into the green leaf that must feed the pods to come. Spotting them early, while they're in just a few plants, keeps the leaf factory working.
Walk the crop twice a week, turning over leaves and checking the growing tips across the whole field.
Aphids / whitefly: look for clusters of tiny green or black insects on shoot tips and leaf undersides, sticky leaves, or little white flies that puff up when you shake a plant. They spread virus — knock off or treat the hot-spots early.
Angular leaf spot: look for grey-brown, straight-edged (angular) patches boxed in by the leaf veins, with fine grey mould underneath.
Bean rust: look for rusty, reddish-brown powdery pustules that rub off onto your finger.
Root rot: look for plants that yellow and wilt in wet patches; pull one and the roots are brown and rotten. Improve drainage — don't waterlog.
- Tip:
Working the crop when it's wet — you spread bacterial blight and leaf spots on your hands, clothes and tools. Wait until the leaves are dry.
- Watch out:
Pale, dull, purple-tinged lower leaves can mean phosphorus is short — note it for next season's P and lime.
- Do:
Pull and remove badly virus-mottled or root-rotted plants so they don't infect the rest.
1st + 2nd weeding Critical
Beans are poor fighters against weeds — a weedy field in the first 4–5 weeks loses water, light and your phosphorus to the weeds exactly when the crop can least spare it. Keeping it clean early is one of the cheapest gains you can make; let weeds win now and no later work recovers it.
Give the crop its first weeding early, about 2 weeks after planting (around day 15), before the weeds get bigger than the beans.
Hoe shallowly — beans root close to the surface, and deep hoeing near the plants cuts those roots.
Do the second weeding about 2 weeks after the first (around day 30 after planting) to keep the field clean right through the critical first month.
In dry areas, leave the pulled weeds lying between the rows as a mulch to hold moisture.
- Do:
Weed while the weeds are still small — a clean field in the first month is the cheapest yield you'll ever gain.
- Tip:
Deep, close hoeing that slices the shallow bean roots — keep the blade shallow near the plants.
- Watch out:
Weed when the crop is dry, not wet, so you don't carry blight from plant to plant on the hoe.
Stake climbers Recommended
Climbing beans out-yield bush beans two to four times — but only if the vines climb. Get the stakes in the moment the vines start to reach (about 15–20 days), before they flop onto the ground where the pods rot and pests find them. (Bush beans don't need this — skip it.)
Watch for the vines starting to twine and reach out — usually about 15–20 days after planting.
Give each hill one strong 2–3 m stake, pushed in firmly beside the plants, or run string/trellis lines between end-posts.
Guide the young vines onto the stake or string once — after that they climb on their own.
Do it before the vines flop onto the soil; a sprawling vine sets far fewer pods and rots on the ground.
- Do:
Stake as soon as the vines reach — a day or two late and they tangle on the ground and are hard to lift.
- Watch out:
Push stakes in firmly; a loaded vine pulls a loose stake over in the wind.
Irrigate Recommended
Steady water through this growing stage keeps the leaves expanding and builds the frame that will carry the pods. Beans can take a little more dryness now than at flowering, but don't let them wilt — and still keep them out of standing water.
Water when the soil is dry a hand-width down (deeper than at seedling stage — the roots have grown).
Water every 7–12 days, depending on heat and soil.
Don't let the crop wilt during this fast-growth stage, but don't waterlog it either — beans rot in soggy soil.
- Tip:
Waterlogging — bean roots rot and the plants yellow. Drain any low spots.
- Watch out:
Ease water back a little now so the plants root deeply, then step it up again at flowering — the critical stage just ahead.
Flowering — protect the flowers
The flowers now set your pods, and this is the crop's most delicate moment. Two things wreck it: dry soil, which aborts flowers and young pods, and heat — a day above 30 °C or a night above 20 °C drops the flowers straight off (which is why your planting date was chosen to bring flowering into cool weather). Keep the soil evenly moist and stay out of the crop when it's wet.
Scout (bacterial blight, rust, pod pests) Critical
At flowering the crop is most open to bacterial blight and rust, which spread fastest in the damp and hit the very leaves feeding the new pods. This is also when you can see whether heat is dropping your flowers. What you catch now protects pods that are only just forming.
Walk the crop twice a week, but only when the leaves are dry — bacteria spread on wet hands and tools.
Bacterial blight: look for water-soaked spots on leaves and pods that dry to brown, sometimes ringed by a yellow halo.
Bean rust: look for rusty reddish-brown pustules on the leaves that dust your finger.
Heat flower-drop: look for flowers falling off without setting pods after hot days or warm nights — a sign the weather is above the crop's limit.
Check the flowers and tiny pods for caterpillars or holes as the first pods set.
- Watch out:
Heat above a day of 30 °C or a night of 20 °C drops the flowers — the warm night is the worse of the two.
- Tip:
Walking into the crop when it's wet with dew or rain — you carry blight from plant to plant. Wait for the leaves to dry.
- Do:
If blight is spreading, remove the worst plants, keep off the wet crop, and plan clean seed and a rotation next season.
Irrigate Critical
This is one of the two make-or-break watering windows. If the soil dries while the crop is flowering, the plant drops its flowers and young pods and they never come back — you can lose a big share of your harvest in a few dry days. If you can water at only one stage, water now.
Keep the soil evenly moist right through flowering — check often and don't let it dry out.
Water every 5–7 days, more often in heat.
Never let the crop wilt at flowering, even for a day — wilting now costs you flowers and pods.
Water in the cool of the morning or evening, gently at the base, so you don't waste it or splash disease onto the leaves.
- Do:
Make flowering your top watering priority of the whole season — this water sets your pods.
- Tip:
Letting the soil dry between waterings now; even a short dry spell at flowering aborts pods.
- Watch out:
Water at the base, not overhead onto flowers and leaves, to keep blight and rust down.
Fill the pods
The pods are now filling with seed — this is where the weight of your harvest is made, and it's the second drought-critical window. If the crop dries out now the seeds stay small and shrivelled. Keep the water coming through pod-fill and watch for pod borers. Green-bean growers start picking now.
Scout (pod borers) Recommended
As the pods fill, pod borers (bollworms) bore in and eat the developing seeds — and once a caterpillar is inside a pod, no spray reaches it. Spotting and treating the young caterpillars before they enter the pods is the only way to save the seed. But treat only if there are enough to matter — a few are not worth spraying.
Walk the crop twice a week through pod-fill, checking flowers and young pods on plants across the field.
Look for small caterpillars on flowers and pods, round entry holes in the pods, and droppings (frass) where a pod joins its stalk.
Open a few suspect pods to see if the seeds inside are eaten.
Treat only if it's worth it — many pods attacked across the field, not just the odd one. Spray while the caterpillars are still outside the pods.
If you must spray: cover your skin, eyes and nose, spray in the cool of the day with the wind behind you, keep it off any pods you'll eat soon, respect the pre-harvest interval on the label (the number of days you must wait between the last spray and eating or selling the pods), and wash afterwards.
- Do:
Time any spray for the young caterpillars on the outside of the pods — once they bore in, spraying is wasted.
- Tip:
Spraying for just a few borers — save the cost and the pre-harvest-interval wait unless many pods are hit.
- Watch out:
Green-bean growers must respect the pre-harvest interval — don't pick pods to eat too soon after any spray.
Irrigate Critical
Pod-fill is the second drought-critical window. The water you give now goes straight into the seeds — dry soil here gives small, shrivelled, fibrous seed and a light harvest. Keep it moist right through pod-fill.
Keep the soil moist through pod-fill — check often, and don't let a dry spell in.
Water every 5–7 days, more in heat.
For dry beans, keep watering while the pods are filling and green, then stop about 20–25 days before harvest so the crop dries down evenly.
For green/snap beans, keep watering right up to the last pick — you're picking pods, not drying them.
- Do:
Treat pod-fill as your second big watering priority (after flowering) — it makes the seed size.
- Watch out:
Dry beans — ease off water near the end so the pods dry and rattle; green beans — water to the last pick.
- Tip:
Letting the crop dry-stress during pod-fill; you can't grow the seed back later.
(Green bean) begin picking Optional
Green (snap) beans are worth most when the pods are young, flat and crisp — before the seeds swell and the pod turns stringy. Picking often keeps the plant making new pods, so a light, regular hand gives you the most tender beans over several weeks. (Skip this if you're growing dry beans.)
Start picking when the pods are full-length but still flat and crisp and snap cleanly when bent — before the seeds bulge through the pod.
Pick gently, holding the stem so you don't tear the plant, taking every ready pod.
Come back every 6–8 days and pick again — 3–4 pickings over about 20–30 days. Regular picking keeps new pods coming.
Keep watering right up to each pick, and get the pods to shade and market quickly — they don't keep.
- Do:
Pick often and young — leaving pods to fatten tells the plant to stop making new ones.
- Watch out:
If you sprayed for pests, respect the pre-harvest interval before picking pods to eat.
- Tip:
Letting pods go stringy and lumpy on the plant — they lose value and slow the next flush.
Harvest the dry grain (or last green pods)
Dry beans are ready at about 65–110 days, when the plant yellows, the pods turn straw-coloured and rattle, and the seeds are hard. Bring the crop in promptly and dry it well, before rain stains and sprouts the seed. Green-bean growers take their last pickings now.
Harvest dry grain Critical
Harvest at the right dryness and you keep the whole crop; leave it too long and the pods shatter and drop their seed on the ground, or rain stains and sprouts the seed and brings weevils. Getting the timing right — and drying before you thresh — is the difference between a clean, sellable harvest and a lost one.
Harvest when the crop is mature and dry: leaves yellow and drop, pods turn straw or tan, dry and rattle, and the seeds are hard — you can't dent one with a thumbnail.
If it's not there yet (leaves still green, pods still leathery, or a seed dents under your thumbnail): don't cut — leave the crop standing and check again in a few days, so the seed finishes filling and hardens for storage.
If you irrigate, stop watering about 20–25 days before so the crop dries down evenly.
Cut or uproot the whole plants in the cool of the morning — fewer pods shatter than when they're bone-dry and brittle in the midday sun.
Lay or stack the plants to dry fully on a tarp or clean surface for a few days — never on bare soil.
Thresh the dry pods (beat them in a sack or with a stick) and winnow out the chaff in the wind, leaving clean grain.
- Do:
Cut and handle the plants in the cool morning — dry pods shatter and spill seed in the midday heat.
- Tip:
Leaving the mature crop standing in the field — pods shatter, and rain stains, sprouts and spoils the seed.
- Watch out:
Thresh gently — hard beating cracks and splits the seed coats, which lowers the price and lets weevils in.
Dry hard and store weevil-proof
The crop is grown — now don't lose it in store. The bean weevil (bruchid) is the big threat: it can turn a good harvest into holed, dusty grain in a few months, even if the beans looked clean coming off the field. Dry the grain hard, sort out any already-holed seed, and seal it airtight so the weevils run out of air and die.
Dry the grain Recommended
Beans stored damp grow mould and won't keep, and damp grain lets weevils breed fast. Drying the grain hard — until a seed cracks rather than squashes when you bite it — is what lets it store for months without spoiling.
Dry the threshed grain (or whole dry pods) on a tarp, mat or raised rack — never on bare ground, which pushes damp back in and adds soil, stones and animal dirt.
Spread it thinly in the sun and turn it regularly so it dries evenly; cover it or bring it in if rain threatens.
Dry to about 12–14% (lower for long storage). Bite test: a seed is dry enough when it cracks rather than dents between your teeth.
If it still dents (too wet): dry it more before storing — damp beans mould and feed weevils.
- Tip:
Drying on bare soil, or storing beans in ordinary open bags — weevils get in and destroy them.
- Do:
Dry on a raised rack or tarp in full sun, turning often, so every seed dries right through.
- Watch out:
Sort out any cracked, holed, stained or mouldy seed as you dry — that's where weevils and rot start; dark, sunken brown-black spots are anthracnose, so throw that seed out too.
Bruchid-safe storage Critical
The bean weevil (bruchid) is the harvest thief — its grubs are often already inside the seed from the field, and in an open bag they multiply until the grain is holed, dusty and worthless. Sealing fully-dry grain airtight starves them of oxygen so they die, saving your beans to eat and to plant — with no chemicals needed.
First make sure the grain is fully dry — a seed cracks, not dents, when bitten. Damp grain spoils even when sealed.
Sort out any already-holed, spotted or damaged seed — holed seed hides live weevils that would breed on inside, and seed with dark, sunken brown-to-black spots is carrying anthracnose, a seed-borne disease.
Seal the clean, dry grain in airtight containers: PICS triple bags (three-layer airtight bags — tie each layer), or sealed drums or bottles filled to the top with little air.
Sealed tight, the oxygen runs out and the weevils die, even beans that were infested in the field — and it needs no chemicals.
Low-cost extras that help: mix wood ash through the grain to clog the weevils, or spread the beans in the hot sun before sealing.
- Do:
Fill sealed drums or bottles right to the top — the less air, the faster the weevils suffocate.
- Tip:
Storing beans in ordinary woven bags — weevils walk straight in and multiply.
- Watch out:
Keep some of your best, unholed, unspotted, fully-dry beans sealed separately as next season's seed — never save stained, dark-spotted (anthracnose) seed for planting, or you sow the disease straight back into next year's crop.
Pests and diseases that attack common bean
-
 Angular leaf spot
 -
 Anthracnose
 -
 Aphids
 -
 Asian soybean rust
 -
 Bacterial blight
 -
 Bean common mosaic virus
 -
 Bean fly
 -
 Bean rust
 -
 Bollworm complex
 -
 Broomrape
 -
 Charcoal rot
 -
 Foot rot
 -
 Fusarium wilt
 -
 Mungbean yellow mosaic virus
 -
 Pod-sucking bugs
 -
 Powdery mildew
 -
 Red spider mite
 -
 Root rot
 -
 Thrips
 -
 Tobacco budworm
 -
 Tomato yellow leaf curl virus
Where to sell common bean
Markets that trade this crop — what each one sells it by, when supply peaks there, and the currency used.
-
 Mbare Musika
-
 Wakulima Market
-
 Kariakoo Market
-
 Kibaigwa Maize Market
-
 Kimironko Market
-
 Marché de Foumbot
-
 Mercado Treinta
-
 Nakasero Market
Grow common bean with a plan, not a guess
This guide is the general answer. Divisi works out yours — the week to plant common bean on your soil and your rainfall, and each job dated for your field.


When to plant common bean, country by country
- When to plant common bean in Algeria
- When to plant common bean in Angola
- When to plant common bean in Benin
- When to plant common bean in Botswana
- When to plant common bean in Burkina Faso
- When to plant common bean in Burundi
- When to plant common bean in Cabo Verde
- When to plant common bean in Cameroon
- When to plant common bean in Comores
- When to plant common bean in Congo
- When to plant common bean in Côte d'Ivoire
- When to plant common bean in Egypt
- When to plant common bean in Eritrea
- When to plant common bean in Eswatini
- When to plant common bean in Ethiopia
- When to plant common bean in Gabon
- When to plant common bean in Gambia
- When to plant common bean in Ghana
- When to plant common bean in Guinea Ecuatorial
- When to plant common bean in Guinea-Bissau
- When to plant common bean in Guinée
- When to plant common bean in Kenya
- When to plant common bean in Lesotho
- When to plant common bean in Liberia
- When to plant common bean in Libya
- When to plant common bean in Madagascar
- When to plant common bean in Malawi
- When to plant common bean in Mali
- When to plant common bean in Mauritanie
- When to plant common bean in Mauritius
- When to plant common bean in Morocco
- When to plant common bean in Moçambique
- When to plant common bean in Namibia
- When to plant common bean in Niger
- When to plant common bean in Nigeria
- When to plant common bean in Rwanda
- When to plant common bean in République centrafricaine
- When to plant common bean in République démocratique du Congo
- When to plant common bean in Sao Tome and Principe
- When to plant common bean in Seychelles
- When to plant common bean in Sierra Leone
- When to plant common bean in Somalia
- When to plant common bean in South Africa
- When to plant common bean in South Sudan
- When to plant common bean in Sudan
- When to plant common bean in Sénégal
- When to plant common bean in Tchad
- When to plant common bean in Togo
- When to plant common bean in Tunisie
- When to plant common bean in Uganda
- When to plant common bean in United Republic of Tanzania
- When to plant common bean in Zambia
- When to plant common bean in Zimbabwe
Where common bean scores best
Districts where Divisi's engine currently rates this crop highest, ranked by fit.


Get Insights by email
A short digest of new Divisi articles. No email on quiet weeks.
Frequently asked questions
How do I grow common bean?
How to grow common bean: 75–120 days to maturity, 50 cm rows, 5–7 cm deep. Also called dry bean, boontjies, boloqe, nyemba, haricot, ibishyimbo.
What is boontjies in English?
Boontjies is the Afrikaans name for common bean.
What is boloqe in English?
Boloqe is the Amharic name for common bean.
What is nyemba in English?
Nyemba is the Chichewa name for common bean.
What is haricot in English?
Haricot is the French name for common bean.
What is ibishyimbo in English?
Ibishyimbo is the Kinyarwanda name for common bean.
What is ibhontshisi in English?
Ibhontshisi is the Ndebele name for common bean.
What is feijão in English?
Feijão is the Portuguese name for common bean.
What is nawa in English?
Nawa (also dinawa) is the Sesotho name for common bean.
What is dinawa in English?
Dinawa is the Setswana name for common bean.
What is bhinzi in English?
Bhinzi is the Shona name for common bean.
What is maharage in English?
Maharage (also maharagwe) is the Swahili name for common bean.
What is imbotyi in English?
Imbotyi (also iimbotyi) is the Xhosa name for common bean.
What is ubhontshisi in English?
Ubhontshisi is the Zulu name for common bean.
How long does common bean take to grow?
Common bean takes about 75–120 days from sowing to maturity, though the exact length varies with variety, temperature and how the season runs.
What spacing should I use for common bean?
Space common bean rows about 50 cm apart, with roughly 10 cm between plants within the row.
How deep should common bean be planted?
Sow common bean at about 5–7 cm deep. Shallower risks drying out; deeper wastes seed energy before the shoot reaches light.
What pests and diseases attack common bean?
The ones covered in this guide are Angular leaf spot, Anthracnose, Aphids. Each has its own page explaining how to identify, check for and control it.