 Divisi
How to grow maize
Zea mays · Poaceae
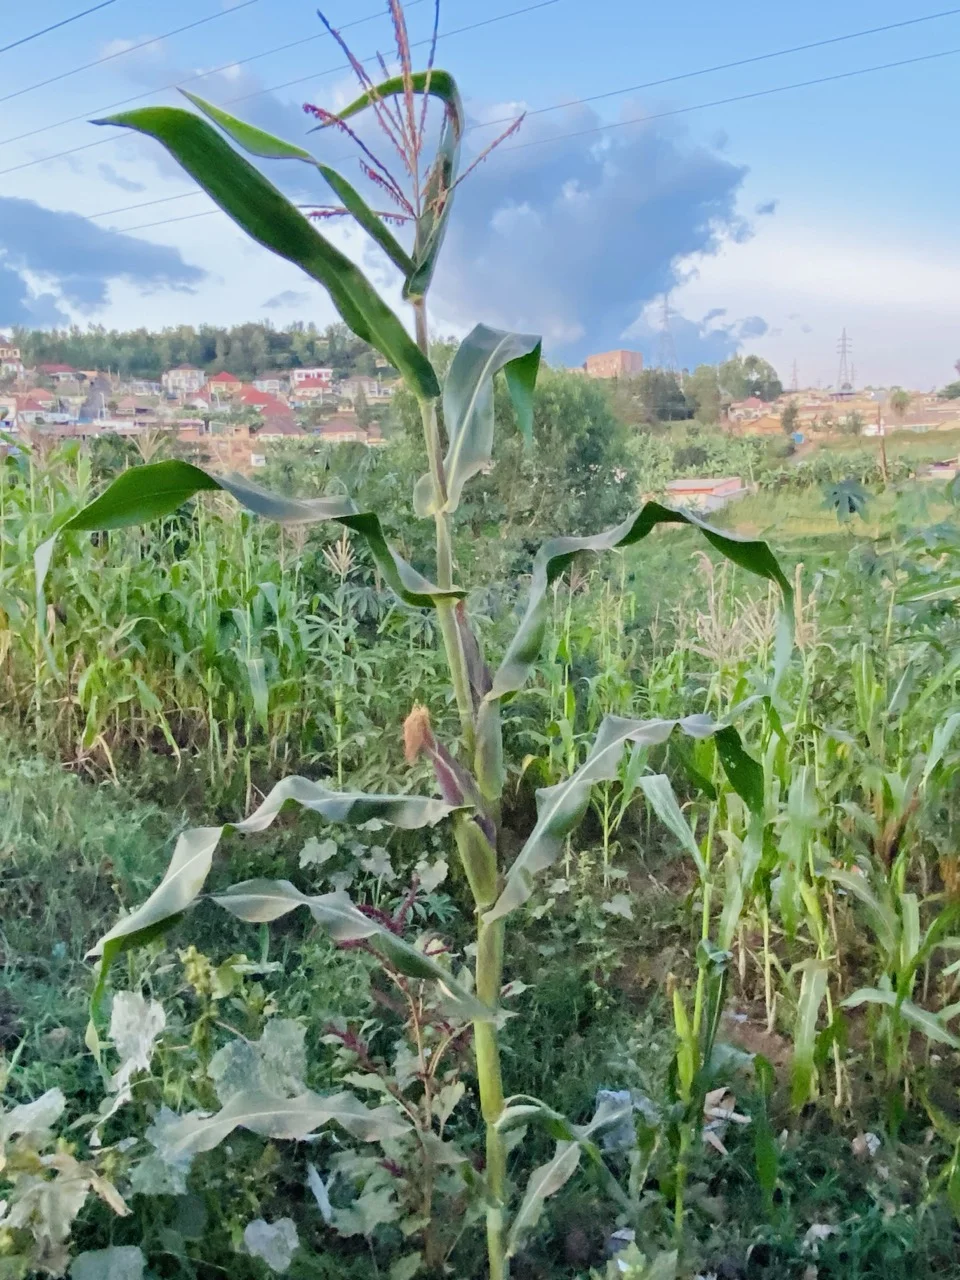
Photo: Ay treasure · CC BY-SA 4.0
C4 annual grass, wind- and cross-pollinated — buy hybrid seed fresh each season and isolate seed crops / sweetcorn from field maize by ~200 m. Covers all field maize (white, yellow, QPM; dent & flint) and sweetcorn / green maize as a use-variant (same suitability; harvested immature).
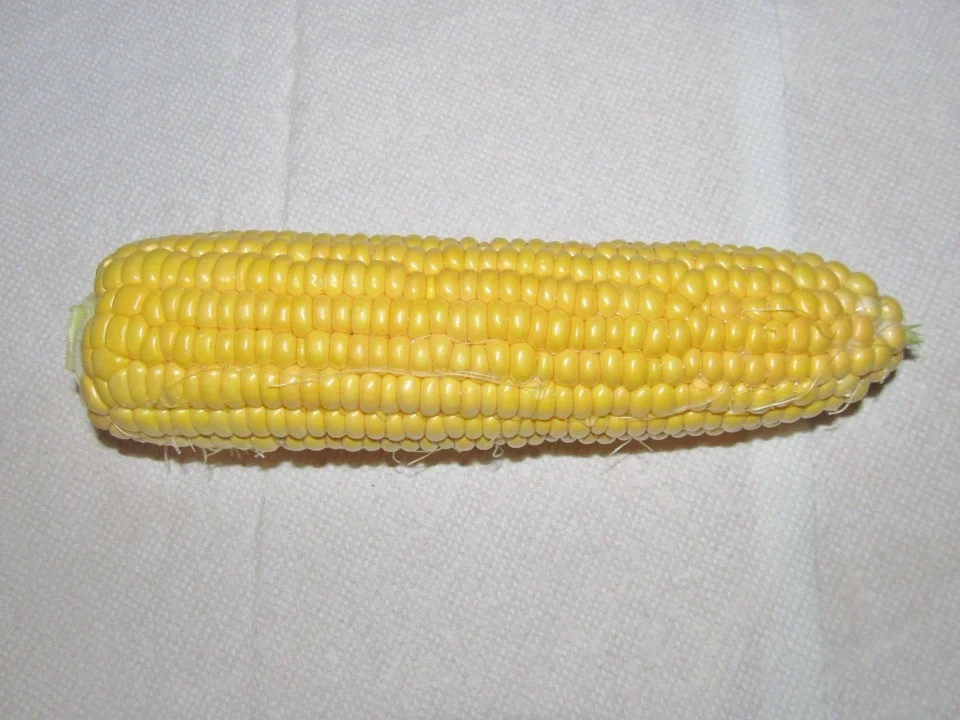
Willis Lam · CC BY-SA 2.0 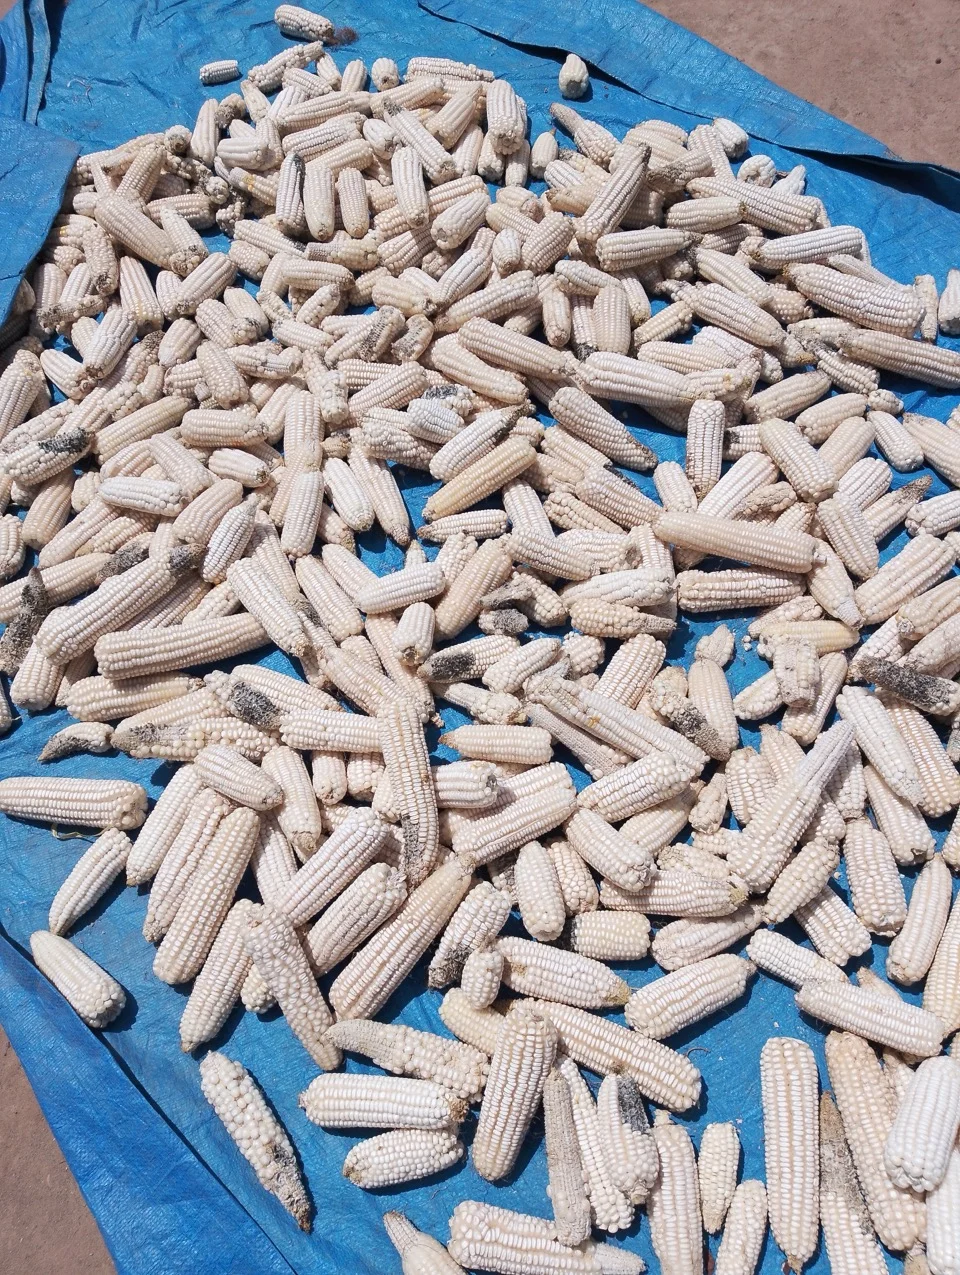
Geossegawa · CC BY 4.0
- Days to maturity
- 120–140 days
- Row spacing
- 75 cm
- Plant spacing in the row
- 25 cm
- Sowing depth
- 3–5 cm
These are general figures for the crop, compiled from published agronomic references including FAO and CABI. The right choice for your field depends on your soil, rainfall and the yield you are aiming for.
Will maize actually do well on your field? Check your own field against every crop in the catalogue — no signup. Run the crop check →
Also known as
Maize is also called corn and green mealie.
- English
- corn, green mealie
- Afrikaans
- mielie
- Amharic
- በቆሎ (bäqollo)
- Chichewa
- chimanga
- French
- maïs
- Hausa
- masara
- Igbo
- ọka
- Kinyarwanda
- ibigori
- Luganda
- kasooli
- Ndebele
- umumbu
- Portuguese
- milho
- Sesotho
- poone
- Setswana
- mmidi
- Shona
- chibage
- Swahili
- mahindi
- Xhosa
- umbona
- Yoruba
- àgbàdo
- Zulu
- ummbila
Working in buckets, bags or paces? The farming glossary turns the measures growers actually use into kilograms and hectares — what a 20 litre bucket of each crop really weighs, and how to size a field by walking it — alongside the Shona, Swahili, Ndebele and Yoruba words used in the field. Open the glossary →
Growing maize, stage by stage
Your maize season, step by step — from getting the field ready, through planting and feeding, to drying and storing the grain so none of it is lost.
Get your field and inputs ready
Almost everything that decides your yield is set before the first seed goes in: good seed, a clean firm seedbed, and lime and fertiliser bought in time. Do this in the weeks before the rains so you can plant the moment a real planting rain falls.
Apply lime (if your soil is sour) Recommended
In sour (acid) soil, maize roots cannot take up the fertiliser you buy — you pay for food the crop can't eat. Lime sweetens the soil, but it works slowly, so it must go on 2–3 months before planting to help this crop.
Only lime if a soil test — or past crops that stayed yellow and stunted even with fertiliser — says your soil is sour. Your recommendation gives the amount for your field.
Spread it evenly over the whole field, like sprinkling flour by hand — patches give you patchy results.
Work it into the topsoil with a hoe or plough. Lime only helps the soil it is mixed into; left on top it does almost nothing.
Do it 2–3 months before you plant (a good time is right after clearing the last crop) — lime is slow, so late liming won't help this season.
- Do:
Spread lime and manure a few weeks apart, not the same day — give each time to work in.
- Watch out:
Wash your hands after handling lime and keep the dust out of your eyes.
Buy your seed and basal fertiliser Critical
Fresh, certified hybrid seed and the right basal fertiliser give the strong, even start that sets your whole season. Buy early — the best varieties sell out, and you want everything in hand before the rains so you can plant on the first good one.
Buy certified seed from a registered dealer — a sealed bag with a label, the variety name, and this season's packing date.
Choose a variety that matches your rains: a short-season variety where rains are short or unreliable, a longer one where they're dependable. Ask the dealer or check your recommendation.
Buy enough basal fertiliser (a compound such as Compound D / NPK) for your field — your recommendation gives the amount.
Store the seed and fertiliser dry, off the floor, away from food, water and children. Keep the label and receipt in case the seed turns out poor.
- Do:
Buy seed in a sealed, labelled bag — loose seed scooped from a sack is often old, mixed, or just treated grain.
- Tip:
Saving grain from last season's hybrid crop for seed — hybrids lose vigour, so the next crop yields far less and grows unevenly.
- Watch out:
Check the packing date, and keep fertiliser dry — damp fertiliser sets hard like a rock and won't spread.
Test that your seed will actually grow Critical
Weak seed leaves gaps in the row you can never fill — every empty station is a plant's worth of cobs gone. Ten minutes now tells you whether to plant this seed or take it back before it's too late.
Count out 100 seeds at random from the bag.
Lay them on a wet cloth or newspaper, roll it loosely, and keep it warm and damp (not dripping) for about a week — wet it again if it dries.
Unroll it and count how many have sprouted a root or shoot.
90 or more out of 100 → good seed, plant it. Fewer than 90 → take it back to the dealer or buy fresh certified seed. Weak seed leaves gaps you can never fix.
- Do:
Do this test a week before you buy the rest (or plant), so you still have time to swap out bad seed.
Clear and prepare a fine, firm seedbed Recommended
Small maize seed needs firm, moist soil pressed against it to sprout evenly. A rough, cloddy or weedy seedbed gives patchy emergence and hands weeds a head start.
Clear weeds and old crop residue off the planting lines (you can leave residue between the rows as mulch).
Loosen the soil to about 15–20 cm — a spade's or plough's depth — so roots go down and rain soaks in.
Break the clods on top to a fine, crumbly tilth. Small maize seed sown into big clods sits in air pockets and comes up patchy.
Level the surface so water doesn't pool. On a slope, work across the slope (not up-and-down), or make basins or tied ridges to catch and hold the rain.
- Do:
Leave crop residue or mulch between the rows — it holds moisture and slows weeds.
Work in manure or compost Recommended
Manure feeds the soil slowly all season, helps it hold water, and makes your bought fertiliser work harder. But fresh manure burns young roots and carries weed seeds — it must be well rotted first.
Use only well-rotted manure or compost — dark, crumbly, no strong smell. Fresh, strawy manure needs more time to rot.
Spread it evenly — about a wheelbarrow every few strides gives a good rate.
Work it into the topsoil 1–2 weeks before planting so it settles in with the soil.
- Tip:
Fresh/raw manure at planting — it scorches young roots, robs nitrogen as it rots, and brings weed seeds.
- Watch out:
Wash your hands after handling manure.
Plant and get a full stand
The number of healthy plants you establish now is the ceiling on your harvest — you can't add plants later. Plant on a real planting rain, one seed per station at the right spacing, with the basal fertiliser beside (never touching) the seed.
Plant your maize on a good planting rain Critical
A full, even stand at the right plant population is the single biggest thing you control — worth 15–40% of your yield. Getting the spacing, depth and fertiliser placement right here pays back all season.
Wait for a real planting rain — one that wets the soil to a spade's depth. Push your hand in: it should come out muddy, not just damp on top. Don't plant on the first light shower.
Open your holes or furrows at the right spacing: about a stride between rows (≈75 cm) and a hand-span between stations (≈25 cm) along the row.
Drop one seed per station, about as deep as your first finger-joint (3–5 cm) — a little deeper in dry, sandy soil, shallower in heavy, wet soil. In very dry areas drop two and thin to one later.
Place the basal fertiliser — about one bottle-cap per station — a hand's width (≈5 cm) to the SIDE of the seed and a little below it, never touching the seed, or it burns and kills the sprout.
Cover and firm the soil over both, so the seed sits snugly in moist earth and comes up strongly.
- Do:
Plant on a real planting rain that soaks a spade deep — a false start on a light shower leaves seed to rot or bake.
- Tip:
Planting too late — the crop then flowers into the hot, dry spell and the cobs never fill.
- Watch out:
Keep fertiliser out of the seed hole and off wet leaves, and wash your hands after handling it.
Scout your young crop (twice a week) Critical
The first month decides your stand. Fall armyworm and cutworms can wipe out young plants in days, and you can only fix gaps if you catch them early. Ten minutes, twice a week, protects the whole season.
Twice a week, walk a large "W" across the field so you cover all four corners and the middle — not just the edge by the path.
At about 10 stops, look closely at 10 plants: the growing point (the whorl in the centre) and under the leaves.
Fall armyworm: look for small "window" holes in the young leaves and moist, sawdust-like droppings in the whorl. The caterpillar has pale stripes and a pale upside-down "Y" on its dark head.
Cutworms: look for young plants cut clean off at ground level (worst in the morning). Scratch the soil nearby to find the fat, grey, curled caterpillar.
Count how many plants in 100 show fresh damage. If 2 or more in every 10 (20%) show fresh whorl damage, act now — open the fall armyworm guide.
Also count the gaps (stations with no plant), so you know whether to gap-fill.
- Watch out:
Fresh, moist droppings in the whorl mean the caterpillar is still inside and feeding. Old, dry droppings with no caterpillar are a past attack — don't waste spray on it.
Check how many plants came up Critical
A thin or patchy stand caps your yield — but you can still fix small gaps in the first two weeks. After that, replacements are too far behind to catch up, so check now.
About a week after planting, walk the rows and count how many plants came up against the number of stations you sowed.
Work out the share that came up (for example, 90 plants from 100 stations = 90%).
90% or more → a good stand, carry on.
Below 90% → gap-fill the biggest gaps in the next few days, while there's still time (see the gap-fill task). Gaps caught now can be filled; later they can't.
Fill gaps and thin to one plant per station Critical
Empty stations are lost cobs; doubled-up stations fight each other and both make small cobs. Evening out the stand now recovers 5–20% of your yield.
Where two or more seedlings share a station, snip the weaker ones off at ground level with a knife — don't pull them, or you disturb the roots of the one you keep.
In big gaps, either transplant a spare seedling (lift it with a ball of soil, in the cool of evening, and water it in) or drop a fresh seed if the soil is still moist and the crop is only a few days old.
Aim for one strong plant at every station, evenly spaced.
First weeding — keep it clean early Critical
Weeds in the first six weeks steal the water, light and fertiliser you paid for, exactly when maize is least able to compete. Weeding early is worth 5–15% of your yield.
Weed by about 2–3 weeks after emergence, before the weeds get bigger than the maize.
Hoe shallowly between and within the rows — deep hoeing near the plants cuts maize roots.
Remove weeds fully (roots and all where you can); chopping only the tops lets many regrow.
In dry areas, leave the pulled weeds lying between the rows as a mulch to hold moisture.
- Do:
Weed while the weeds are still small — a clean field in the first 6 weeks is the cheapest yield you will ever gain.
Irrigate to keep the young crop growing Critical
Young roots are shallow and dry out fast. Steady moisture now gives even emergence and a strong, uniform start.
Keep the topsoil moist but not waterlogged — maize hates sitting in water.
Water every few days, more often in heat and on sandy soils that dry fast.
Check by pushing a finger into the soil: water when the top few centimetres are dry.
- Tip:
Waterlogging the field — maize roots rot in standing water. Drain low spots.
Feed it and keep it clean
Now the plant builds its frame and sets how many kernels each cob can carry. Two things matter most: keep it weed-free through the first six weeks, and feed nitrogen in splits so the rain doesn't wash it away.
Scout the growing crop (twice a week) Critical
This is when fall armyworm hides deep in the whorl, stalk borers tunnel in, and leaf diseases and nitrogen hunger first show. Catching them early keeps the leaf factory working.
Twice a week, walk the "W" and check about 10 plants at 10 stops.
Whorl: keep checking for fall armyworm — window holes and moist droppings deep in the whorl.
Leaves: look for neat rows of "shot-holes" across unfolding leaves (stalk borer); small grey/tan rectangular spots or long grey lesions on lower leaves (grey leaf spot / blight); yellow streaks running along the leaf (maize streak virus).
Colour: pale, yellowing lower leaves with a yellow "V" running from the tip mean nitrogen hunger — a sign it's time to top-dress.
Note what you see and where. If anything is over threshold, act — open the matching pest or disease guide.
Second weeding Critical
The crop hasn't yet shaded the ground, so a second flush of weeds will still rob it. This weeding protects the biggest slice of yield — 10–30% — in the critical weed-free window.
Weed again before the canopy closes — roughly 4–5 weeks after emergence.
Hoe shallowly so you don't damage the now-spreading maize roots.
Time it just before you top-dress, so the nitrogen feeds the maize and not the weeds.
First nitrogen top-dressing (knee-high) Recommended
Maize eats most of its nitrogen during fast growth. Splitting it — half now, half before tasseling — means less is washed away by rain and more goes into the crop, worth 10–25%.
Apply when the crop is about knee-high (roughly 4–5 weeks).
Band the nitrogen (AN or urea) — about half a bottle-cap per plant — a hand's width (≈10 cm) to the side of the row, not on top of the plants.
Do it when the soil is moist (after a weeding or light rain) and cover it or water it in, so it doesn't gas off into the air and go to waste.
Keep the fertiliser off wet leaves — the grains stick and scorch them. Wash your hands afterwards.
- Tip:
Putting all the nitrogen on in one go — a heavy rain washes it straight past the roots. Split it into two feeds.
Third weeding and earthing-up Recommended
A final clean-up before the canopy closes — and pulling soil up around the stems anchors the plants against lodging (falling over) in wind and storms.
Remove any remaining weeds while you still can walk the rows.
Draw soil up around the base of the stems to cover the surface roots and steady each plant.
This also buries any surface top-dressing and closes soil cracks that dry the roots.
Irrigate through vegetative growth Recommended
Steady water keeps the leaves expanding and builds the frame that will carry the cobs.
Water every 7–10 days, depending on heat and soil type.
Don't let the crop wilt during this fast-growth stage — it sets the size of the plant.
Protect flowering — the make-or-break window
For about two weeks around tasseling and silking, pollen must reach the silks to set kernels. Heat or dry soil now does more damage than at any other time. Finish your nitrogen before the tassel shows, and keep the crop stress-free.
Second nitrogen top-dressing (before tasseling) Recommended
The plant's biggest nitrogen demand comes right before flowering. This last feed fills out the cob and keeps the leaves green through grain fill. Once the tassel is out, it's too late to help.
Apply just before the tassels emerge (around 7–8 weeks) — when the plant is about to flower.
Band it — about half a bottle-cap per plant — a hand's width (≈10 cm) to the side of the row, on moist soil, and cover or water it in.
This is the last nitrogen of the season — don't apply any after silking; it won't reach the grain. Wash your hands afterwards.
Scout the ears and silks Critical
Now fall armyworm moves onto the developing ears, and you can see whether pollination is working. Damaged silks and tips mean fewer kernels on the cob.
Twice a week, check the tassels, silks and the tips of the forming cobs on about 10 plants at several stops.
Look for caterpillars feeding on the silks or boring into the ear tip — fall armyworm now targets the cob itself. If damage is spreading, open the fall armyworm guide.
Gently feel a few ears: a well-pollinated cob feels full to the tip. Note any tip damage or the start of rot.
After storms, look for lodged (fallen or leaning) plants.
- Watch out:
Heat or dry soil during silking is the single biggest yield-killer of the whole season — if you can water at only one stage, water now.
Water through silking — never let it stress Critical
Dry soil or heat during silking can cut yield by up to half, because kernels that don't get pollinated never set. This is the top priority for water in the whole season.
Keep the soil moist right through tasseling and silking — this beats every other watering.
Water every 5–7 days, more often in heat.
Never let the crop wilt at this stage, even for a day.
Fill the grain and finish clean
The kernels are filling with starch — this is where the weight comes from. Keep the leaves green and healthy through early fill, then let the crop dry down. Harvest is triggered by the black layer.
Water through early grain fill, then ease off Recommended
Grain weight is laid down now, so keep water coming while the leaves are green. Later, easing off helps the crop dry down for safe storage.
Keep watering through the milk and dough stages while the leaves are still green.
As the lower leaves and the husks start to dry, reduce watering.
Stop once the crop reaches the dent / black-layer stage, so it can dry down in the field.
Scout during grain fill Recommended
Late problems — ear rot, lodging and birds — attack the grain you've already grown. Spotting them lets you harvest the affected part early rather than lose it.
Once a week, check a sample of cobs and look over the standing crop.
Peel back a few husks and look for mouldy, discoloured or rotting kernels (ear rot). Cobs whose husks are tight and point downward shed rain and rot less.
Look for lodged (fallen or leaning) plants, especially after wind or storms — they dry unevenly and are hard to harvest.
Watch the field edges for bird and rodent damage as the grain hardens.
If ear rot or lodging is spreading, harvest the affected part early rather than lose it.
Check for the black layer (the grain is mature) Recommended
The black layer is the plant's own sign that the grain has stopped filling — maximum weight is in. From here, the faster it dries, the safer it is from rot and storage pests.
Pick a few cobs from different plants and pull off some kernels from near the tip and the middle.
Look at the point where the kernel joined the cob — a small black or brown layer there means that kernel is mature.
When most kernels show the black layer, the crop has reached full maturity.
It no longer needs water — let it dry down in the field. If storms or birds threaten, harvest now rather than wait for a perfect dry-down.
Harvest
Harvest at the right moment and get the crop off the field before rain, birds and rot eat into what you grew.
Harvest your maize Critical
Harvest at the right moment: green mealies are perishable and sell fast, while dry grain should come off the field as soon as it's dry, to beat rain, rot, birds and storage pests.
For green mealies (roasting or boiling): pick when the kernels are full and milky — press one with a thumbnail and a milky liquid squirts out (about 65–85 days). Sell or eat within a day or two; they don't keep.
For dry grain: wait until the kernels are hard and dented, the husks are dry and brown, and the black layer has formed (about 20–25% moisture).
Snap the cobs off. In dry weather you can leave them a little longer on the plant, but bring them in before rain or before bird and rodent losses climb.
Keep the husks on if you'll dry on cribs; strip them if you'll dry on racks or tarpaulins.
Dry, shell and store
The crop is grown — now don't lose it. Most storage loss comes from grain stored too wet (mould and aflatoxin) or unprotected (weevils and larger grain borer). Dry it hard, shell it clean, and seal it.
Dry your grain hard before storing Critical
Grain stored above about 13% moisture grows mould and aflatoxin — a hidden poison that harms your family and gets your grain rejected at the market. Drying hard is the difference between a crop that keeps and one that spoils.
Dry the cobs or shelled grain on a crib, rack, mat or tarpaulin — never on bare ground, which pushes damp back in and adds mould, stones and animal dirt.
Turn it regularly so it dries evenly, and cover it if rain threatens.
Fingernail test: the grain is dry enough when a kernel is too hard to dent with your fingernail and shatters (not squashes) when you bite it.
Salt-bottle test: seal a handful of grain with a spoon of dry salt in a clean, dry bottle for 15 minutes. If the salt sticks to the glass, the grain is still too wet → dry it more before storing.
- Tip:
Drying on bare ground — the grain picks up damp, mould, stones and aflatoxin. Always use a raised crib, rack, mat or tarpaulin.
Shell clean and store sealed Critical
Weevils and the larger grain borer can eat through a third of a badly-stored crop. Clean, dry grain in a sealed container starves the pests of air and keeps your harvest whole to eat and sell.
Shell the dry grain and winnow out the chaff, broken grain and dust — pests breed fastest in the trash.
Store in hermetic (airtight) bags or a clean, sealed metal silo. Airtight storage suffocates weevils and grain borer with no chemicals needed.
If you use ordinary bags, mix in a recommended grain protectant, and keep the bags off the floor and away from the wall, in a cool, dry place.
Check the store once a month for heating, moths, or grain with small round holes (borer) — act early if you see them.
- Tip:
Storing damp grain in open bags — weevils and grain borer move in fast. Dry to 13% or less and seal it.
- Watch out:
If you use a storage dust/protectant, follow the label, keep it off grain you'll eat within weeks, and wash your hands.
Pests and diseases that attack maize
-
 African armyworm
 -
 Angoumois grain moth
 -
 Cereal stem borers
 -
 Charcoal rot
 -
 Cutworms
 -
 Diplodia root and stalk rot
 -
 Eldana stalk borer
 -
 Fall armyworm
 -
 Fusarium head blight
 -
 Grasshoppers
 -
 Grey leaf spot
 -
 Larger grain borer
 -
 Leaf spot
 -
 Maize ear rot
 -
 Maize streak virus
 -
 Maize weevil
 -
 Rodents
 -
 Rust
Rust -
 Smut
Smut -
 Stem and bulb nematode
 -
 Striga (witchweed)
 -
 Sugarcane mosaic virus
 -
 Termites
 -
 Turcicum leaf blight
 -
 White grubs
Where to sell maize
Markets that trade this crop — what each one sells it by, when supply peaks there, and the currency used.
-
 Dawanau International Grains Market
-
 Mbare Musika
-
 Mile 12 Market
-
 Wakulima Market
-
 Grand Marché de Bamako
-
 Grand Marché de Kinshasa
-
 Kariakoo Market
-
 Kibaigwa Maize Market
Grow maize with a plan, not a guess
This guide is the general answer. Divisi works out yours — the week to plant maize on your soil and your rainfall, and each job dated for your field.


When to plant maize, country by country
- When to plant maize in Algeria
- When to plant maize in Angola
- When to plant maize in Benin
- When to plant maize in Botswana
- When to plant maize in Burkina Faso
- When to plant maize in Burundi
- When to plant maize in Cabo Verde
- When to plant maize in Cameroon
- When to plant maize in Comores
- When to plant maize in Congo
- When to plant maize in Côte d'Ivoire
- When to plant maize in Egypt
- When to plant maize in Eritrea
- When to plant maize in Eswatini
- When to plant maize in Ethiopia
- When to plant maize in Gabon
- When to plant maize in Gambia
- When to plant maize in Ghana
- When to plant maize in Guinea Ecuatorial
- When to plant maize in Guinea-Bissau
- When to plant maize in Guinée
- When to plant maize in Kenya
- When to plant maize in Lesotho
- When to plant maize in Liberia
- When to plant maize in Libya
- When to plant maize in Madagascar
- When to plant maize in Malawi
- When to plant maize in Mali
- When to plant maize in Mauritanie
- When to plant maize in Mauritius
- When to plant maize in Morocco
- When to plant maize in Moçambique
- When to plant maize in Namibia
- When to plant maize in Niger
- When to plant maize in Nigeria
- When to plant maize in Rwanda
- When to plant maize in République centrafricaine
- When to plant maize in République démocratique du Congo
- When to plant maize in Sao Tome and Principe
- When to plant maize in Seychelles
- When to plant maize in Sierra Leone
- When to plant maize in Somalia
- When to plant maize in South Africa
- When to plant maize in South Sudan
- When to plant maize in Sudan
- When to plant maize in Sénégal
- When to plant maize in Tchad
- When to plant maize in Togo
- When to plant maize in Tunisie
- When to plant maize in Uganda
- When to plant maize in United Republic of Tanzania
- When to plant maize in Zambia
- When to plant maize in Zimbabwe
Where maize scores best
Districts where Divisi's engine currently rates this crop highest, ranked by fit.


Get Insights by email
A short digest of new Divisi articles. No email on quiet weeks.
Frequently asked questions
How do I grow maize?
How to grow maize: 120–140 days to maturity, 75 cm rows, 3–5 cm deep. Also called corn, mielie, በቆሎ (bäqollo), chimanga, maïs, masara, ọka, ibigori.
What is mielie in English?
Mielie is the Afrikaans name for maize.
What is በቆሎ (bäqollo) in English?
በቆሎ (bäqollo) is the Amharic name for maize.
What is chimanga in English?
Chimanga is the Chichewa name for maize.
What is maïs in English?
Maïs is the French name for maize.
What is masara in English?
Masara is the Hausa name for maize.
What is ọka in English?
Ọka is the Igbo name for maize.
What is ibigori in English?
Ibigori is the Kinyarwanda name for maize.
What is kasooli in English?
Kasooli is the Luganda name for maize.
What is umumbu in English?
Umumbu is the Ndebele name for maize.
What is milho in English?
Milho is the Portuguese name for maize.
What is poone in English?
Poone is the Sesotho name for maize.
What is mmidi in English?
Mmidi is the Setswana name for maize.
What is chibage in English?
Chibage is the Shona name for maize.
What is mahindi in English?
Mahindi is the Swahili name for maize.
What is umbona in English?
Umbona is the Xhosa name for maize.
What is àgbàdo in English?
Àgbàdo is the Yoruba name for maize.
What is ummbila in English?
Ummbila is the Zulu name for maize.
How long does maize take to grow?
Maize takes about 120–140 days from sowing to maturity, though the exact length varies with variety, temperature and how the season runs.
What spacing should I use for maize?
Space maize rows about 75 cm apart, with roughly 25 cm between plants within the row.
How deep should maize be planted?
Sow maize at about 3–5 cm deep. Shallower risks drying out; deeper wastes seed energy before the shoot reaches light.
What pests and diseases attack maize?
The ones covered in this guide are African armyworm, Angoumois grain moth, Cereal stem borers. Each has its own page explaining how to identify, check for and control it.