 Divisi
How to grow tomato
Solanum lycopersicum · Solanaceae
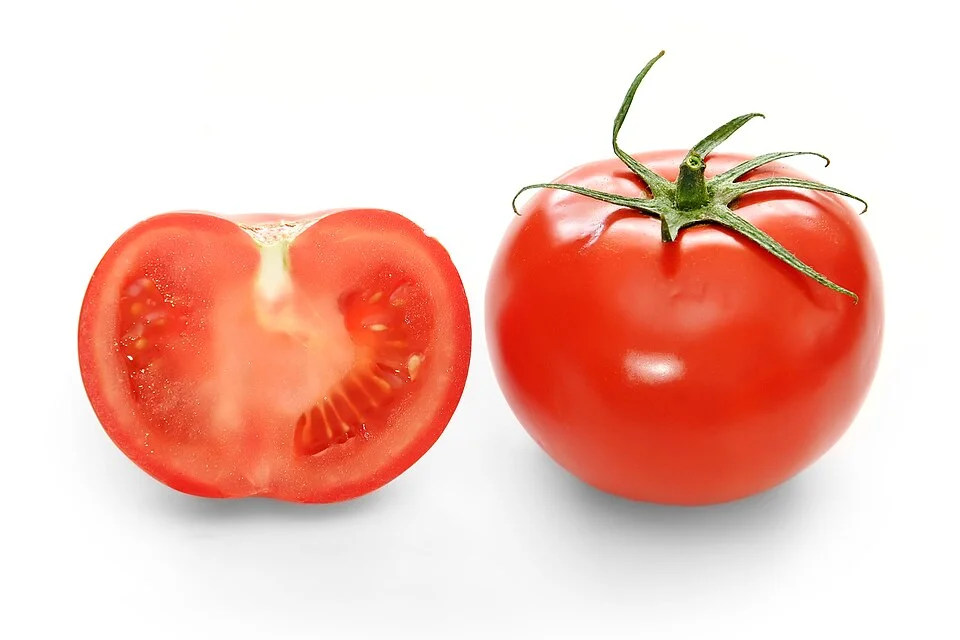
Photo: fir0002 flagstaffotos [at] gmail.com Canon 20D + Sigma 150mm f/2.8 · GFDL 1.2
Tomato is the number-one cash vegetable across sub-Saharan Africa — and one of the most demanding. Unlike a grain you sow straight into the field, tomato starts life in a small nursery, then moves to the field as a young seedling. It rewards care and punishes neglect. It lives on three things: steady, even water (let the soil swing wet-then-dry and the fruit rots at the end or splits open), relentless pest scouting (the tomato leafminer Tuta absoluta, the whitefly and the leaf-curl virus it carries, and the blights can each wipe out a crop), and support and pruning to keep the plants up off the ground with air moving through them. Grown well, a small, well-tended plot can out-earn a whole field of maize; grown carelessly, it can lose you everything you spent.
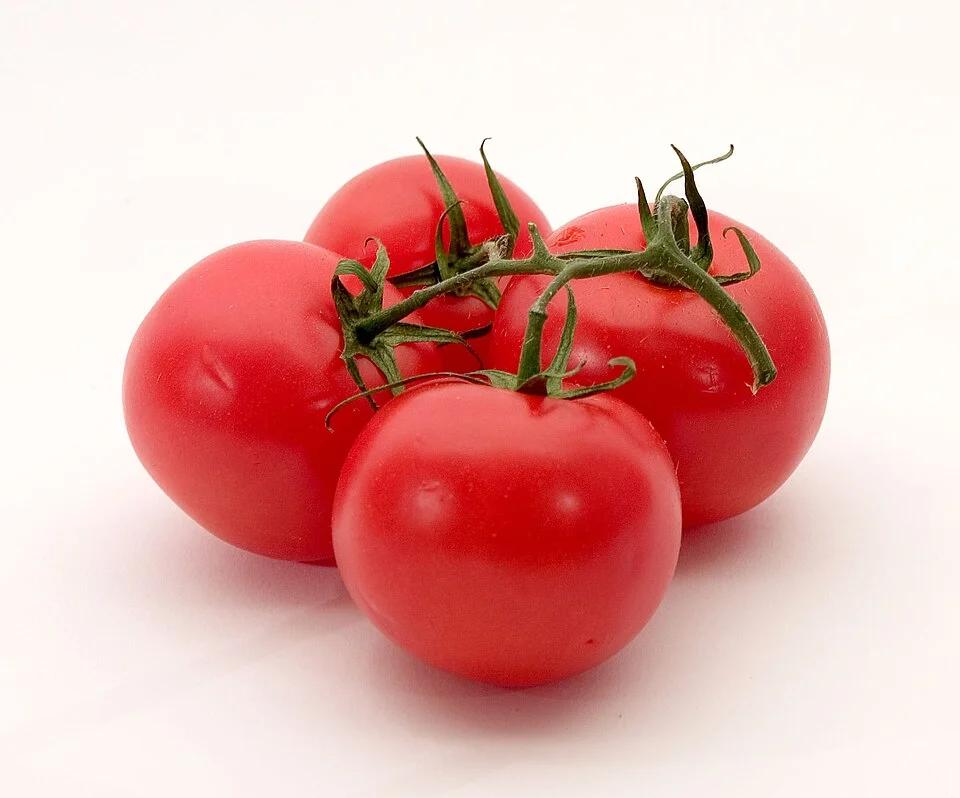
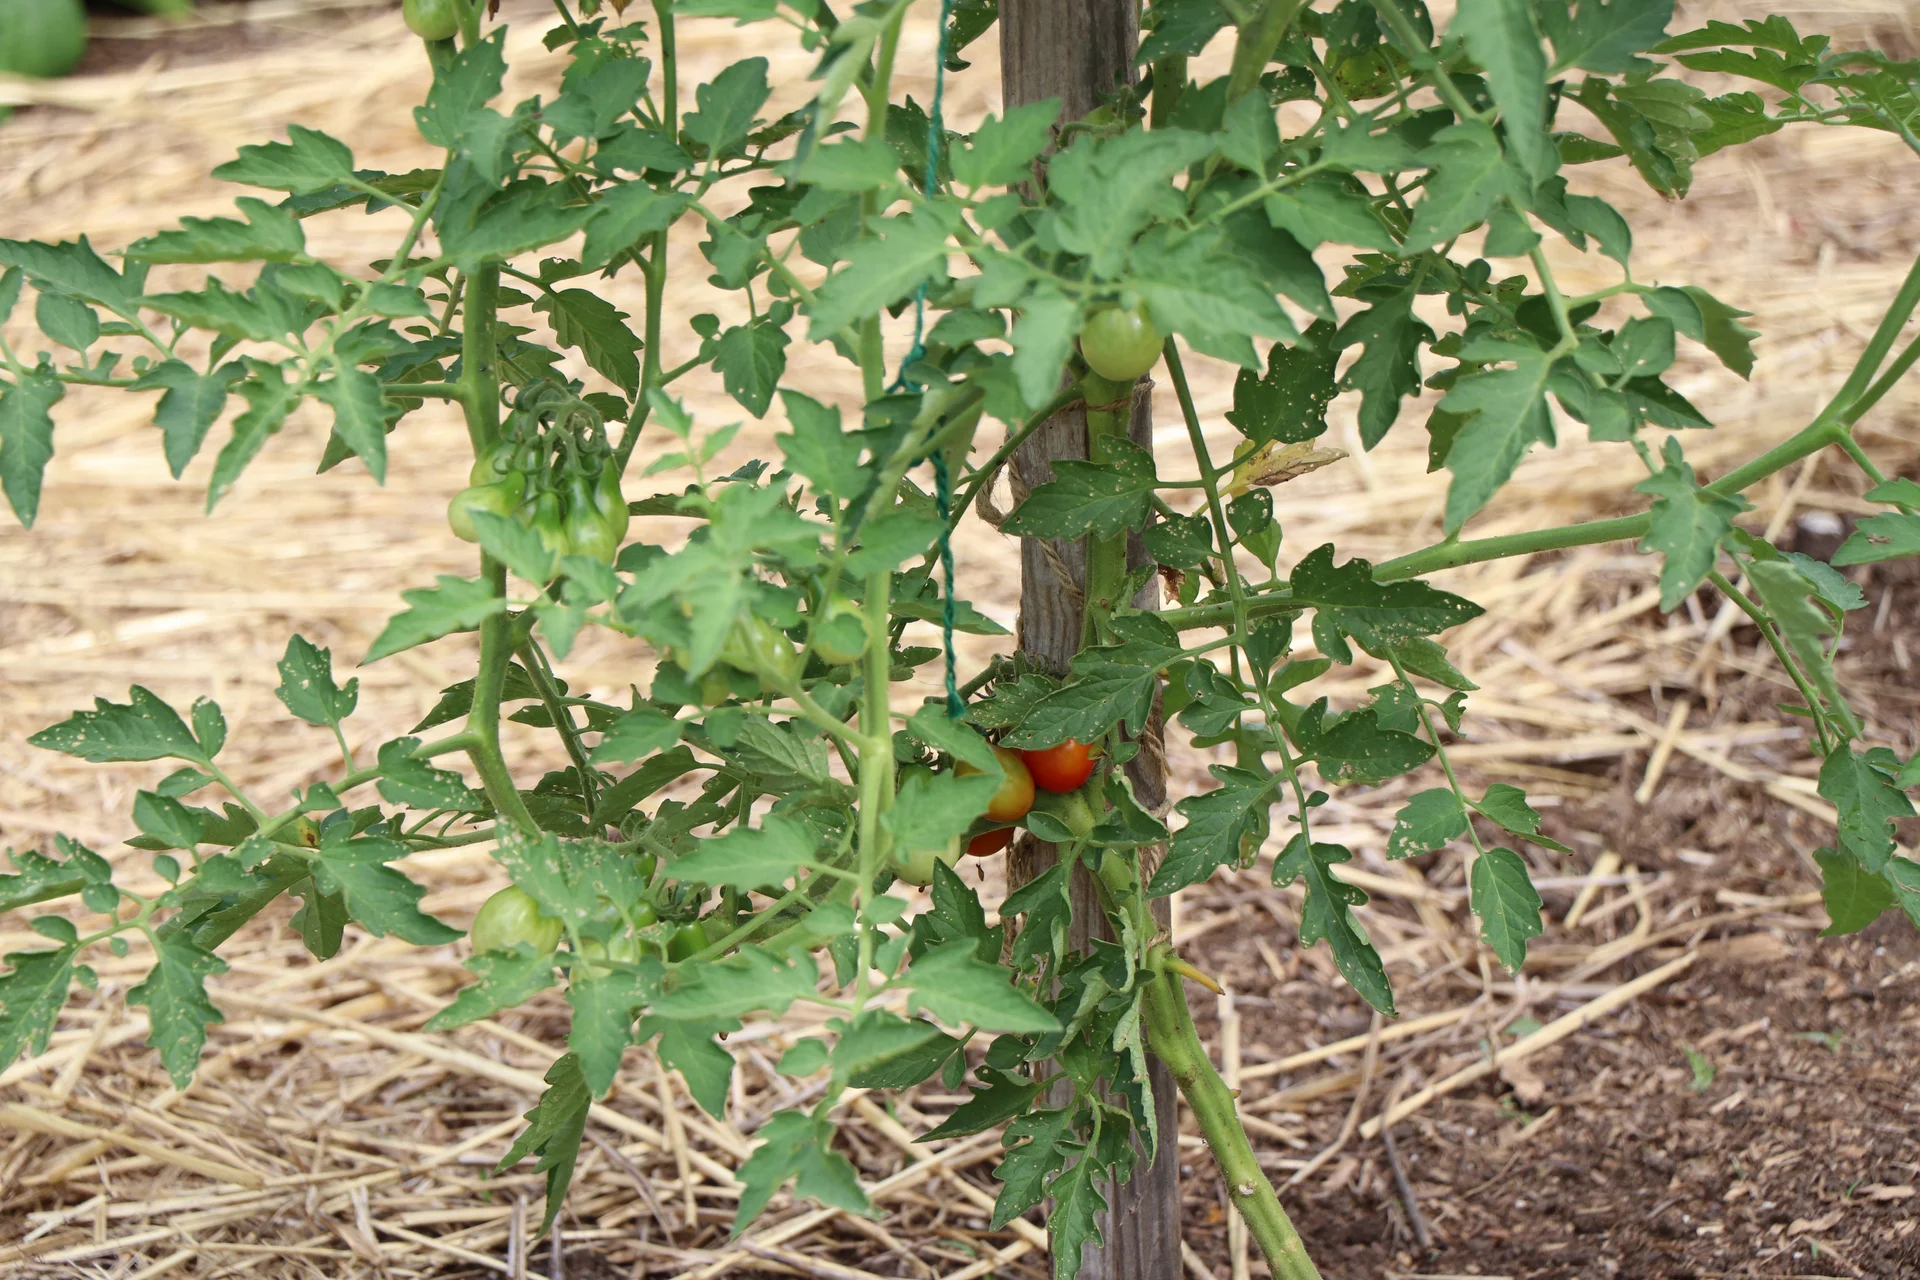
- Days to maturity
- 90–150 days
- Row spacing
- 80 cm
- Plant spacing in the row
- 40 cm
- Sowing depth
- 0.5–1 cm
These are general figures for the crop, compiled from published agronomic references including FAO and CABI. The right choice for your field depends on your soil, rainfall and the yield you are aiming for.
Will tomato actually do well on your field? Check your own field against every crop in the catalogue — no signup. Run the crop check →
Also known as
- Afrikaans
- tamatie
- Amharic
- timatim
- Chichewa
- phwetekere
- French
- tomate
- Hausa
- tumatir
- Ndebele
- itamatisi
- Portuguese
- tomate
- Sesotho
- tamati, ditamati
- Setswana
- tamati, ditamati
- Shona
- domasi
- Swahili
- nyanya
- Xhosa
- itumato
- Zulu
- utamatisi
Working in buckets, bags or paces? The farming glossary turns the measures growers actually use into kilograms and hectares — what a 20 litre bucket of each crop really weighs, and how to size a field by walking it — alongside the Shona, Swahili, Ndebele and Yoruba words used in the field. Open the glossary →
Growing tomato, stage by stage
Your tomato season, step by step — from raising strong seedlings in a nursery, through transplanting, staking, feeding and relentless pest watching, to picking and handling the fruit gently so it reaches the market whole.
Raise strong seedlings in a nursery
Tomato does not go straight into the field — you first raise it in a small, protected nursery bed for about a month. This is where you win or lose the crop before it even starts: clean seed on a clean, well-drained bed gives you stocky, healthy seedlings, while a dirty, wet bed breeds damping-off that rots seedlings and topples them in patches overnight. Aim for a transplant that is 21-30 days old, 15-25 cm tall, stocky (not thin and leggy), with 4-5 true leaves.
Prepare & sterilise the seedbed Critical
Young tomato seedlings can be killed in a single night by damping-off — a soil fungus that rots them at the base and topples them in patches. It lives in old, dirty, wet soil. A raised, clean, sterilised bed is your one real defence: get this right and the whole nursery comes up healthy; get it wrong and no spray will save it later.
Pick a fresh spot in full sun that has not grown tomato, pepper, potato or eggplant recently — these cousins share the same soil diseases.
Build a raised bed, at least one hand-span high (≈20 cm) and about a stride wide, so water drains away fast and never sits on the roots.
Sterilise the soil to kill the damping-off fungus and nematodes. The method that fits this week: pile dry grass over the bed and burn it off a day or two before you sow. (Solarising — covering the wet bed tightly with clear plastic for 4-6 weeks of hot sun — also works, but it is slow: you must start it well over a month ahead, so it only helps if you planned this bed weeks in advance.)
Mix in well-rotted compost to feed the seedlings — never fresh manure, which burns the tiny roots and carries disease and weed seed.
Rake the top fine and level, so the small seed sits evenly and water spreads without washing it into piles.
- Do:
Raise the bed high and choose a fresh site — a flat, re-used bed stays wet, and that is exactly where damping-off starts.
- Tip:
Fresh manure on a seedbed — it scorches the seedlings and brings in the very diseases you are trying to keep out.
- Watch out:
Let a burned bed cool right down before sowing, and wash your hands after handling manure or compost.
Sow certified seed Critical
Tomato seed is tiny, and one good packet carries your whole crop — so it must be clean, certified seed sown at the right shallow depth. Buried too deep it never pushes up; sown too thick it grows thin and leggy and invites damping-off. Emergence takes about 8 days.
Buy certified seed in a sealed, labelled packet from a registered dealer — not loose seed or seed saved from last year's fruit, which carries disease and grows unevenly.
Make shallow drills across the bed, about two finger-widths apart, and sow the seed thinly — it is small, so scatter it like a light pinch of salt, not in clumps.
Cover with only a light dusting of fine soil (about ½ cm) — barely more than the seed's own thickness. Tomato seed is tiny and cannot climb up from deep.
Water gently in the morning with a fine rose or a soft sprinkle, and keep the bed moist but never soggy — wet soil is what wakes up damping-off.
Look for the seedlings to break ground in about 8 days. If a patch topples and rots at the base → that is damping-off: thin out the crowding, cut back watering, and let the surface dry between waterings.
- Do:
Sow thinly so each seedling gets air and light and grows stocky — crowded seedlings grow thin, weak and disease-prone.
- Tip:
Watering in the evening — a bed that goes into the night wet is a bed that gets damping-off. Water in the morning so it dries by dusk.
- Watch out:
Keep the label and receipt in case the seed comes up poorly and you need to take it back.
Harden off the seedlings Recommended
A seedling raised soft, shaded and always wet will wilt and stall the moment it hits the hot, open field. Hardening off toughens it in its last week or two so it barely notices the move and re-roots fast, instead of sulking for a week or dying outright.
Start hardening off in the last 6-14 days before you plan to transplant, once the seedlings have 4-5 true leaves.
Cut back the water a little — let the surface dry more between waterings so the seedlings toughen up (but never let them wilt hard).
If you shaded the bed, take the shade off gradually so the seedlings get used to full sun.
Stop hardening and water the bed well about half a day (12 hours) before lifting, so the seedlings go to the field plump and a ball of soil holds together on their roots.
- Do:
Harden gradually over days — a sudden cut in water or shade shocks the seedlings instead of toughening them.
- Watch out:
A ready seedling is stocky and 15-25 cm, not tall and thin — leggy seedlings were sown too thick or kept too dark, and they transplant poorly.
Prepare the field and get your seedlings
While the nursery grows, get the field ready. Tomato stands in one place for months and feeds hard, so the whole job here is clean, well-drained, well-fed ground — rotated away from its own family so bacterial wilt can't follow it in, limed if the soil is sour, fed with compost and the first (basal) fertiliser. If you're not raising your own seedlings, buy strong, healthy ones now.
Prepare the field + basal Critical
Tomato stands in one place for three to five months and pulls hard on the soil, so the ground must be clean, loose and fed before a single seedling goes in. Land that recently grew tomato, potato, pepper or eggplant carries bacterial wilt — a soil disease with no cure — straight into your new crop, and a compacted, sour or hungry bed stunts the roots from day one.
Do this in the 2 weeks before transplanting. Choose land that has not grown tomato, potato, pepper or eggplant for at least 2-3 seasons — better still, one rested under a cereal (maize, sorghum). Those crops share tomato's worst soil disease, bacterial wilt, which has no cure.
Clear old crop trash and weeds, then dig or plough the soil over at least a spade deep so roots can push down freely. On flat or heavy land, make raised beds or ridges so rain drains away — standing water rots roots and wakes up bacterial wilt.
Work in well-rotted compost or manure — dark, crumbly, no strong smell — to feed the soil and help it hold moisture evenly through the season. Never use fresh manure; it burns young roots and carries disease and weed seed.
If your soil is sour (acid) — past crops stayed pale and stunted, or a test reads below pH 5.5 — work in lime now. Tomato wants soil closer to neutral (pH 6.0-6.8), and lime also adds calcium, which helps fight blossom-end rot later.
Work the basal fertiliser into the bed just before transplanting — your recommendation gives the exact amount. This phosphorus-rich feed drives the strong early rooting the plant needs before it starts climbing.
- Do:
Rotate well away from tomato-family crops — the single biggest thing you can do to keep bacterial wilt out of a field you'll be tending for months.
- Tip:
Planting into a low, wet corner 'to save the good land' — that is exactly where bacterial wilt and root rot take hold.
- Watch out:
Wash your hands after handling lime and fertiliser, keep them off food, water and children, and out of your eyes.
Source healthy seedlings Critical
If you're not raising your own, the seedlings you buy are your crop from day one — a sick or leggy transplant never fully recovers, and a single diseased seedling can seed the whole field with virus or wilt. Buy strong, clean plants from a trusted nursery in the week before you transplant.
Buy stocky, dark-green seedlings 15-25 cm tall with 4-5 true leaves and a thick stem — not tall, thin, pale or pot-bound (roots coiled tight in the pot) ones.
Check each one: no cupped, yellow-edged or crinkled leaves — a sign of the leaf-curl virus — and no wilting or spots. Reject the whole batch if many look sick.
Buy from a nursery that raises its seedlings under net or screen — those carry the fewest whitefly and the least virus.
Transplant them within a day or two of buying, and keep them shaded and watered until you do.
- Do:
Pick short, stocky, deep-green seedlings — they root fast and catch up quickly.
- Tip:
Buying cheap, leggy or yellowing seedlings, or any with cupped or crinkled leaves — you're buying a poor crop and maybe a virus.
Transplant and get them rooting
The nursery seedling now moves to the field and must re-root fast before the sun can wilt it. Move it in the cool of late afternoon or on a cloudy day, set each seedling deep, and water it in straight away — a smooth move means the plant never checks its growth. Even watering from day one is also where you begin beating blossom-end rot months later. This is also when whitefly first arrives carrying the incurable leaf-curl virus (TYLCV — tomato yellow leaf-curl virus), so scouting starts now.
Transplant + water in Critical
How you move the seedling decides how fast it recovers. Planted in the heat of the day it wilts and stalls; planted deep, in the cool, and watered in, it grows fresh roots along the buried stem and races away. A strong, even start here is the frame the whole crop is built on.
Transplant in the late afternoon or on a cool, cloudy day — never in the hot midday sun, which wilts the seedling before it can root.
Water the nursery well beforehand and lift each seedling with a ball of soil on its roots, so you barely disturb them.
Set each seedling deep — right up to its seed-leaves (cotyledons). Bury a tall, leggy stem even deeper; tomato grows new roots all along the buried stem, giving a stronger plant.
Space the plants about two hand-spans apart along the row (≈40 cm) and leave 60-100 cm between rows, so you can walk, stake, prune and spray.
Firm the soil around each stem and water in at once with at least a cup per plant, so the roots meet damp soil with no air pockets.
- Do:
Plant in the cool of evening and water in immediately — the seedling then roots overnight instead of wilting in the sun.
- Tip:
Planting shallow or leaving the roots loose — a wobbly, half-buried seedling roots slowly and blows over.
- Watch out:
Start even watering from this very day — the wet-then-dry swings that begin now are what cause blossom-end rot on the fruit later.
Gap-fill from spares Recommended
Some seedlings always fail to take — they wilt, get cut down, or rot. Every empty station is a plant's worth of fruit lost. Filling the gaps in the first week or so, while spare seedlings are the same age, keeps the whole field even and ripening together.
When you transplant, keep a few spare seedlings back in the nursery for exactly this.
Walk the field 5-10 days after transplanting and mark every station where the seedling died or never took.
Replant each gap in the cool of evening with a spare, lifted with a ball of soil, and water it in just like the first plants.
Do it early — a plant put in two weeks late never catches up, and it shades or gets shaded by its bigger neighbours.
- Do:
Fill gaps within the first week or so, while the spares still match the field — later replacements always lag behind.
- Watch out:
If seedlings keep wilting and dying despite water, suspect bacterial wilt in the soil (see scouting) — don't just replant tomato into the same sick spot.
Scout cutworms, wilt, whitefly Critical
The first two weeks decide your stand. Cutworms fell young plants overnight, bacterial wilt collapses them from the inside, and tiny whiteflies inject the leaf-curl virus (TYLCV) that has no cure. A miss here can cost you plants you can never replace. Ten minutes every few days protects the whole crop.
Walk the field in a large "W" every 3-4 days, checking plants at the four corners and the middle — not just along the path.
Cutworms: look for young plants cut clean off at ground level (worst in the morning). Scratch the soil nearby to find the fat, grey, curled caterpillar and squash it.
Bacterial wilt: watch for a plant that wilts in the heat of the day but stays green — no yellowing first. Cut a wilted stem low and stand it in clear water: milky threads streaming out means bacterial wilt — pull that plant out and remove it, and don't replant tomato there.
Whitefly: shake a plant and watch for a cloud of tiny white flies rising from under the leaves; check the leaf undersides. They are the carriers of the leaf-curl virus.
Leaf-curl virus (TYLCV): look for new leaves that are small, cupped upward, yellow at the edges and crinkled, on a stunted plant. There is no cure — pull and remove infected plants so whitefly can't carry it on to the rest.
- Do:
Fight the whitefly, not just the virus — the fly is the carrier, and keeping its numbers down is the only way to slow the leaf-curl virus.
- Tip:
Leaving a wilt- or virus-struck plant standing 'to see if it recovers' — it won't, and it infects its neighbours in the meantime.
- Watch out:
A plant that wilts by day but is still green (not yellow) is the classic sign of bacterial wilt, not thirst — watering it more will not help.
Irrigate — keep steadily moist Critical
A just-moved seedling has few roots and dries out fast. Steady moisture now gives an even, unchecked start — and the even-watering habit you build in these first two weeks is what stops blossom-end rot on the fruit later in the season.
Keep the topsoil steadily moist for the first two weeks — water every 2-3 days, more often in heat or on sandy soil that dries fast.
Water at the base of the plant, not over the leaves — wet leaves invite blight and rot.
Check with a finger: water when the top few centimetres are dry, but never leave the plant sitting in water.
- Do:
Water little and often at first — aim for even moisture, not a flood followed by a drought.
- Tip:
Wetting the leaves and letting water pool at the stem — both feed the blights and rots that plague tomato.
Build the frame: stake, prune, feed
Now the plant builds the frame that will carry your fruit — and the choices you make here decide how much disease you fight later. Get the plants up off the ground on stakes or strings, open them up by pruning, feed the first nitrogen, and mulch. Air moving through a staked, pruned plant keeps the deadly blights and Tuta in check; a sprawling, crowded plant on the ground is a disease trap. Keep scouting hard — this is when Tuta absoluta (tomato leafminer) arrives.
Scout Tuta, blights, whitefly Critical
This stage is when your worst enemies arrive together. Tuta absoluta mines white tunnels through the leaves and can strip a plant; early and late blight can brown off the whole crop in wet weather; whitefly keeps spreading virus. Catching each one early — and rotating your sprays — is the difference between a manageable problem and a wipeout.
Walk the "W" every 3-4 days and check the leaves top and bottom on plants across the whole field.
Tuta (tomato leafminer): look for pale, winding tunnels (mines) inside the leaf, like blister-trails, with tiny black droppings — hold a leaf up to the light to see the grub inside.
Early blight: look for brown spots with rings inside them, like a target, starting on the older, lower leaves, often ringed with a yellow halo.
Late blight: look for large, greasy grey-brown patches on leaves and stems, with white mould underneath in damp weather — it spreads fast and kills whole plants, so act at the very first sign.
Whitefly: keep checking the leaf undersides for the tiny white flies that carry virus.
Note what you find and where. If anything is over threshold → open the matching pest or disease guide and act now.
- Do:
Rotate between different chemical groups across sprays — Tuta and mites build resistance fast, and one group used over and over soon stops working.
- Watch out:
Late blight explodes in cool, wet, cloudy spells — scout harder and be ready to spray protectively (spray to prevent it, before you even see the disease) after rain.
- Tip:
Spraying in the heat of the day or into the wind — spray in the cool, with the wind behind you, cover your skin, nose and eyes, keep it off food, and wash afterwards.
Install stakes + first tie Recommended
Tomato left to sprawl on the ground rots, gets eaten, and can't be sprayed properly. Getting every plant up on a stake or string lifts the fruit into the air and light, lets the wind dry the leaves (starving the blights), and makes picking and spraying easy. Do it early, before the plant flops over.
Put a strong stake beside each plant, or run overhead wires and drop a string down to each plant, while the plants are still young and upright.
Push each stake in on the opposite side to the roots, so you don't spear the root ball.
Make the first tie low on the stem, about 30 cm up — a hand-span and a half, using a soft strip of cloth or banana fibre in a loose figure-of-eight — snug to the stake, loose around the stem so it doesn't cut in as the stem thickens.
Plan to add a fresh tie every 20-30 cm as the plant climbs through the season.
- Do:
Tie loosely in a figure-of-eight, with the crossover between stem and stake — a tight tie strangles the stem as it grows.
- Tip:
Waiting until the plant has flopped over — a bent, sprawled stem never straightens and the fruit ends up sitting in the dirt.
Prune to 1–2 leaders (indeterminate) Recommended
A staking (indeterminate) tomato throws out endless side-shoots that turn it into a dense bush — no air moves, blight thrives, and the plant feeds leaves instead of fruit. Pruning to 1-2 main stems opens it up, cuts disease, and puts the plant's strength into bigger, cleaner fruit. (Bush/determinate types need little or no pruning.)
Know your type first: staking (indeterminate) types grow taller all season and need pruning; bush (determinate) types stay short, set most fruit at once, and should not be heavily pruned.
On staking types, choose the 1-2 strongest stems to keep as your leaders.
Pinch out the side-shoots — the little shoots that sprout in the 'armpit' between the main stem and a leaf — while they are still small (5-10 cm), snapping them off with your fingers.
Do this every week, since new shoots keep coming — a short weekly walk keeps the job easy.
Don't over-strip the plant: leave enough leaf to shade the fruit, or the exposed fruit gets sunscald (a pale, scalded patch).
- Do:
Prune little and often (weekly) while the shoots are small — snapping off a tiny shoot barely wounds the plant.
- Tip:
Stripping many leaves at once — bare fruit scalds in the sun, and big pruning wounds are open doors for disease.
- Watch out:
Prune and handle the plants when they are dry, never wet — wet hands and tools carry blight and bacterial disease from plant to plant.
1st N top-dress + mulch Recommended
Once the plant is rooted and climbing, it needs nitrogen to build the leafy frame that will feed the fruit — and a mulch to keep the soil evenly moist. Steady moisture under mulch is a key defence against blossom-end rot later. Feed now, while the plant is growing fast, and it carries that strength into flowering.
Apply the first nitrogen top-dress about 3 weeks after transplanting, when the plants are established and growing away strongly.
Band it in a line about a hand's width (≈10 cm) from the stems — roughly one bottle-cap per plant — never heaped against the stem, where it burns the plant.
Apply onto moist soil (after watering or light rain) and cover it or water it in, so it feeds the roots instead of gassing off into the air.
Lay a mulch of dry grass or straw around the plants to hold the moisture even and stop soil-borne disease splashing up onto the lower leaves.
- Do:
Keep fertiliser off the leaves and off the stem, keep it away from food, water and children, and wash your hands afterwards.
- Tip:
Piling nitrogen against the stem — it scorches the plant and the fertiliser is wasted.
- Watch out:
Don't overdo the nitrogen — too much makes a jungle of leaves and few fruit. Feed steadily, not heavily.
Irrigate — even, never wet–dry swings Critical
This is where the even-watering habit must hold. A tomato that is starved and then flooded builds fruit that will rot at the ends (blossom-end rot) and split. Steady moisture now, held in by mulch, sets the plant up to carry clean fruit through flowering and fill.
Water every 3-4 days, aiming for even soil moisture — never let the plant wilt and then drown it.
Water at the base, under the mulch, keeping the leaves dry to starve the blights.
On sandy soils and in heat, water more often but with less each time — the goal is steady, not swinging.
- Do:
Keep the watering even and regular — the single habit that most cuts blossom-end rot and splitting later.
- Tip:
Long dry spells broken by a heavy soak — that sudden swing is exactly what rots and cracks the fruit.
Flowering and fruit set
The plant now flowers, and each flower that sets becomes a fruit — so this is the make-or-break window. It is the most water-sensitive stage of the whole crop, and heat drops the flowers before they can set. Keep the water dead-even and never let the plant stress, feed a little boron to help the flowers set, hold the soil sweet (pH ~6.0-6.5) and mulched to beat blossom-end rot, and keep scouting the caterpillars that now attack the flowers and fruit.
Scout Tuta, bollworm, mites Critical
As flowers and small fruit appear, new pests home in on them. Tuta now bores into the young fruit, the African bollworm chews holes straight into it, and red spider mite silvers and dries the leaves in hot, dusty weather. And heat itself can drop the whole flush of flowers — so here you watch pests and weather together.
Walk the "W" every 3-4 days, now checking the flowers and young fruit as well as the leaves.
Bollworm: look for round holes bored into green fruit and fat caterpillars — pick off and destroy any holed fruit and every caterpillar you find.
Tuta: look for mines in the leaves and pin-holes boring into the small fruit near the stalk.
Red spider mite: look for leaves going pale, stippled and dusty-silver, with fine webbing underneath — worst in hot, dry, dusty spells; check the lower leaves first.
Watch the weather and the flowers: on very hot days, check whether flowers are drying and dropping without setting fruit. If flowers are dropping instead of setting → the cause is almost always heat or a dry spell: even out the water, top up the mulch to cool the soil, and shade or wait out the worst heat.
- Watch out:
Day above 32 °C or night above 21 °C drops the flowers — where you can, time the flowering flush out of the peak-heat weeks, and keep the crop cool with even water and mulch.
- Do:
Rotate spray groups and respect the pre-harvest interval (the days you must wait after spraying before it is safe to pick) on the label — you are now only days from picking fruit that people will eat.
- Tip:
Spraying open flowers in the heat of the day — spray in the cool early morning or evening to protect pollination and the bees.
Even irrigation through set Critical
This is the thirstiest, most water-sensitive stage of the whole crop — even watering through flowering is worth 15-40% of your yield. Let the plant dry out now and the flowers drop and the fruit ends rot; keep it evenly moist and the fruit sets and swells clean.
Keep the soil evenly moist right through flowering and fruit set — do not let it dry out more than about four-tenths (40%) of the way down before you water again.
Water every 2-3 days, under the mulch, at the base of the plant.
Never let the plant wilt at this stage, even for a single day — one hard dry spell now drops flowers and starts blossom-end rot.
If you can only water well at one stage in the whole season, make it this one.
- Do:
Hold the moisture steady — even watering here is the biggest single thing you can do for yield right now.
- Tip:
A dry spell followed by a heavy soak — that swing is what causes blossom-end rot (the black, sunken patch on the fruit bottom) and splitting.
- Watch out:
Blossom-end rot is a water-and-calcium problem, not a disease — no spray fixes it; only even water and mulch do.
Boron before flowering Recommended
Boron is a tiny nutrient that helps flowers set and pollen work — a small foliar feed just before flowering can lift your fruit set. But it is a knife-edge: too little and flowers set poorly, too much is toxic and blocks calcium (making blossom-end rot worse). So you feed the recommended rate only — never more.
Apply boron just before the flowers open (your recommendation gives the exact timing and amount).
Mix the exact recommended amount into water — measure it, do not guess — and spray it as a fine mist over the leaves.
Spray in the cool of early morning or evening, with the wind behind you, covering your skin, nose and eyes.
Never apply more than the recommended rate. Extra boron poisons the plant and makes blossom-end rot worse by locking out the calcium the fruit needs.
- Do:
Measure the boron precisely — the gap between 'helps' and 'harms' is very small.
- Tip:
Adding 'a bit extra for good measure' — excess boron is toxic to the plant and blocks calcium.
- Watch out:
Keep the spray off food and water, respect the pre-harvest interval on the label, and wash well afterwards.
Fill and ripen the fruit
The fruit is set — now it must swell, firm up and ripen. This is where potassium and steady water decide the size, weight, firmness and taste of what you sell. Feed potassium through the fill, keep the water dead-even (a sudden soak now makes the fruit split), hold up the heavy trusses so they don't snap, and thin the lower leaves for airflow — but keep enough canopy to shade the fruit from sunscald. Tuta and late blight are still hunting the fruit, so don't drop your guard.
Scout Tuta on fruit, late blight, sunscald Critical
The fruit you can nearly taste is exactly what the pests want. Tuta bores into ripening fruit and ruins it for market, late blight can rot fruit on the plant in a wet spell, and sunscald scalds exposed fruit in the heat. Spotting trouble now lets you pick or protect the fruit before you lose it.
Walk the "W" every 3-4 days, checking the fruit closely now — not just the leaves.
Tuta on fruit: look for pin-holes and tunnels boring into the fruit, usually near the stalk, with dark droppings — pick and destroy holed fruit every pass.
Late blight on fruit: look for hard, greasy, brown-marbled patches on green fruit, and greasy grey patches on leaves and stems, spreading fast in cool, wet weather.
Sunscald: look for pale, papery, sunken patches on the side of the fruit facing the sun — a sign you have pruned or de-leafed too hard and left fruit exposed.
Remove and destroy any mined, rotten or fallen fruit on every pass — it breaks the Tuta and fruit-fly cycle.
- Do:
Keep removing and destroying damaged fruit — leaving it lying breeds the next generation of Tuta and fruit fly.
- Watch out:
In cool, wet, cloudy weather, late blight can rot the crop in days — scout harder and spray protectively.
- Tip:
Spraying close to harvest without checking the pre-harvest interval — you are picking fruit that people will eat within days.
K top-dress through fill Recommended
Potassium is the fruit-filling nutrient — it builds the size, firmness, colour and taste that fetch a good price. Tomato pulls more potassium than any other nutrient, so feeding it in small doses through the whole fill keeps the fruit swelling evenly right to the last pick.
Start the potassium top-dress as the first fruits are swelling, and repeat every 10-14 days through the fill.
Band it about a hand's width from the stems — roughly one bottle-cap per plant — onto moist soil, and water it in.
Keep it off the leaves, the stem and the fruit.
- Do:
Feed potassium in small, repeated doses through the fill, not one big load — steady feeding gives even, firm fruit.
- Watch out:
Wash your hands after handling fertiliser, and keep it away from food, water and children.
Consistent irrigation + mulch Critical
Steady water is what turns set fruit into big, unsplit, unrotten fruit. The danger now is cracking: if the plant goes dry and then gets a heavy soak, the fruit swells faster than its skin can stretch and splits open, spoiling it for market. Even watering under mulch is the whole game.
Water every 2-3 days to keep the soil evenly moist — the same steady rhythm, right through fruit fill.
Keep the mulch topped up to hold moisture even and cushion the swings between waterings.
Never let the plant dry out and then flood it — a big drink after a dry spell is what cracks the fruit.
Water at the base, keeping the leaves and fruit dry to starve late blight.
- Do:
Hold the water even — even watering here prevents both cracking and a late round of blossom-end rot.
- Tip:
The dry-then-drench swing — it splits ripening fruit right when it is worth the most.
Support trusses / de-leaf lower leaves Optional
Heavy trusses of fruit can snap a stem or bend it to the ground, where the fruit rots and gets eaten. And the old, shaded lower leaves are where blight starts and splashes up. Holding up the trusses and stripping the lowest leaves keeps fruit clean and air moving — but strip too much and the sun scalds the fruit.
As the trusses get heavy, tie them up or prop the stem so the weight doesn't snap or bend it down to the ground.
Strip off the lowest, oldest and any diseased leaves — especially those touching the soil — to open airflow and stop soil-borne blight splashing up.
Keep enough upper canopy to shade the fruit — do not strip the plant bare, or the exposed fruit gets sunscald.
Do this when the plants are dry, and carry any diseased leaves out of the field to destroy — don't drop them between the rows.
- Do:
Remove the lower leaves that touch the soil first — they are the launch pad for late blight.
- Tip:
Over-stripping the canopy — bare fruit scalds pale and papery in the sun.
- Watch out:
De-leaf and handle plants only when they are dry — wet hands and tools spread blight from plant to plant.
Pick to the market, pass by pass
Tomato does not ripen all at once — you pick it over many passes, every one to three days, choosing the ripeness that suits where it is going. Firm mature-green or breaker fruit travels far without bruising; pink to red-ripe has the best taste for a nearby market. Handle every fruit gently, keep the little green cap (calyx) on, and clear out any pest-damaged or fallen fruit each pass to break the pest cycle.
Pick fruit to market colour Critical
When and how you pick decides whether the fruit survives the journey and fetches full price. Pick too ripe for a far market and it arrives as pulp; pick and handle it roughly and it bruises and rots. Picking to the right colour, gently, every couple of days, is how you turn a good crop into good money.
Match the colour to the market: pick at mature-green or 'breaker' (the first blush of colour) for fruit that must travel far — it is firmest and rides best; pick pink to red-ripe for local sale or eating, where taste matters most.
Pick often — every 1-3 days, especially in the heat, so the fruit doesn't over-ripen on the plant.
Twist the fruit gently to snap it off at the knuckle (the natural joint on the stalk), and keep the green cap (calyx) on — it holds and sells better.
Lay the fruit gently into a crate — never toss or heap it. A bruise you can't see now becomes a rotten fruit by market day.
Remove and destroy any holed, mined or fallen fruit on every pass — this breaks the Tuta and fruit-fly cycle for the passes still to come.
- Do:
Pick in the cool of the morning and get the fruit straight into shade — fruit picked hot spoils fastest.
- Tip:
Heaping fruit deep in one big container — the weight bruises the fruit at the bottom.
- Watch out:
For a distant market, err toward breaker/mature-green — a shade under-ripe travels well; dead-ripe does not.
Cool, grade and handle gently
The fruit is grown — now don't lose it to heat and bruising. Tomato is highly perishable (across the region, 20-50% is lost after picking), and most of that loss is avoidable: get the field heat out fast, handle it in crates not sacks, grade out the damaged fruit, and keep it cool but not cold. A little care here is the difference between fruit that reaches the market whole and fruit that arrives as waste.
Cool, grade and pack in ventilated crates Recommended
Heat and rough handling are what turn good fruit into losses. Warm fruit ripens and rots fast; fruit crammed in a sack crushes itself. Cooling it quickly, grading it, and packing it in crates is how you hold on to the quality you grew all the way to the buyer.
Get the field heat out fast: since you picked in the cool morning, move the fruit straight into the shade and keep it there — never leave crates standing in the sun.
Pack in ventilated crates, not sacks or deep baskets — air must move through, and the stacked weight must not crush the fruit.
Grade the fruit by size and colour, and cull out any cracked, holed, rotting or sunscalded fruit — one rotting fruit spreads rot to its neighbours.
Keep it cool but not cold: hold mature-green fruit around 12-15 °C and ripe fruit around 10-12 °C; never chill below about 10 °C, or the fruit gets cold-damaged, goes pitted, and never ripens properly.
- Tip:
Packing in sacks or deep baskets (the fruit crushes and bruises) and chilling ripe fruit below ~10 °C (cold injury ruins it).
- Do:
Sort out the damaged fruit before storing or sending — one rotten tomato spoils the whole crate.
- Watch out:
Sell or move ripe fruit quickly — it does not keep, and every hot hour costs you shelf life.
Pests and diseases that attack tomato
-
 Alternaria leaf blight
 -
 Anthracnose
 -
 Aphids
 -
 Bacterial soft rot
 -
 Bacterial spot
 -
 Bacterial wilt
 -
 Bollworm complex
 -
 Broad mite
 -
 Broomrape
 -
 Bunch rot (grey mould)
 -
 Chilli leaf curl virus
 -
 Collar rot
 -
 Cucumber mosaic virus
 -
 Cutworms
 -
 Damping-off
 -
 Early blight
 -
 Flea beetles
 -
 Foot rot
 -
 Fusarium wilt
 -
 Late blight
 -
 Leaf miners
 -
 Leaf spot
 -
 Leaf-eating caterpillar
 -
 Mealybugs
 -
 Papaya mealybug
 -
 Pepper viruses
 -
 Phytophthora blight
 -
 Plant-parasitic nematodes
 -
 Potato tuber moth
 -
 Powdery mildew
 -
 Red spider mite
 -
 Root-knot nematode
 -
 Slugs and snails
 -
 Thrips
 -
 Tobacco budworm
 -
 Tobacco mosaic virus
 -
 Tomato leafminer
 -
 Tomato yellow leaf curl virus
 -
 Whitefly
Where to sell tomato
Markets that trade this crop — what each one sells it by, when supply peaks there, and the currency used.
-
 Joburg Market
-
 Mbare Musika
-
 Mile 12 Market
-
 Wakulima Market
-
 Atkilt Tera
-
 Kariakoo Market
-
 Kimironko Market
-
 Kongowea Market
Grow tomato with a plan, not a guess
This guide is the general answer. Divisi works out yours — the week to plant tomato on your soil and your rainfall, and each job dated for your field.


When to plant tomato, country by country
- When to plant tomato in Algeria
- When to plant tomato in Angola
- When to plant tomato in Benin
- When to plant tomato in Botswana
- When to plant tomato in Burkina Faso
- When to plant tomato in Burundi
- When to plant tomato in Cabo Verde
- When to plant tomato in Cameroon
- When to plant tomato in Comores
- When to plant tomato in Congo
- When to plant tomato in Côte d'Ivoire
- When to plant tomato in Egypt
- When to plant tomato in Eritrea
- When to plant tomato in Eswatini
- When to plant tomato in Ethiopia
- When to plant tomato in Gabon
- When to plant tomato in Gambia
- When to plant tomato in Ghana
- When to plant tomato in Guinea Ecuatorial
- When to plant tomato in Guinea-Bissau
- When to plant tomato in Guinée
- When to plant tomato in Kenya
- When to plant tomato in Lesotho
- When to plant tomato in Liberia
- When to plant tomato in Libya
- When to plant tomato in Madagascar
- When to plant tomato in Malawi
- When to plant tomato in Mali
- When to plant tomato in Mauritanie
- When to plant tomato in Mauritius
- When to plant tomato in Morocco
- When to plant tomato in Moçambique
- When to plant tomato in Namibia
- When to plant tomato in Niger
- When to plant tomato in Nigeria
- When to plant tomato in Rwanda
- When to plant tomato in République centrafricaine
- When to plant tomato in République démocratique du Congo
- When to plant tomato in Sao Tome and Principe
- When to plant tomato in Seychelles
- When to plant tomato in Sierra Leone
- When to plant tomato in Somalia
- When to plant tomato in South Africa
- When to plant tomato in South Sudan
- When to plant tomato in Sudan
- When to plant tomato in Sénégal
- When to plant tomato in Tchad
- When to plant tomato in Togo
- When to plant tomato in Tunisie
- When to plant tomato in Uganda
- When to plant tomato in United Republic of Tanzania
- When to plant tomato in Zambia
- When to plant tomato in Zimbabwe
Where tomato scores best
Districts where Divisi's engine currently rates this crop highest, ranked by fit.


Get Insights by email
A short digest of new Divisi articles. No email on quiet weeks.
Frequently asked questions
How do I grow tomato?
How to grow tomato: 90–150 days to maturity, 80 cm rows, 0.5–1 cm deep. Also called tamatie, timatim, phwetekere, tomate, tumatir, itamatisi, tamati.
What is tamatie in English?
Tamatie is the Afrikaans name for tomato.
What is timatim in English?
Timatim is the Amharic name for tomato.
What is phwetekere in English?
Phwetekere is the Chichewa name for tomato.
What is tomate in English?
Tomate is the French and Portuguese name for tomato.
What is tumatir in English?
Tumatir is the Hausa name for tomato.
What is itamatisi in English?
Itamatisi is the Ndebele name for tomato.
What is tamati in English?
Tamati (also ditamati) is the Sesotho and Setswana name for tomato.
What is domasi in English?
Domasi is the Shona name for tomato.
What is nyanya in English?
Nyanya is the Swahili name for tomato.
What is itumato in English?
Itumato is the Xhosa name for tomato.
What is utamatisi in English?
Utamatisi is the Zulu name for tomato.
How long does tomato take to grow?
Tomato takes about 90–150 days from sowing to maturity, though the exact length varies with variety, temperature and how the season runs.
What spacing should I use for tomato?
Space tomato rows about 80 cm apart, with roughly 40 cm between plants within the row.
How deep should tomato be planted?
Sow tomato at about 0.5–1 cm deep. Shallower risks drying out; deeper wastes seed energy before the shoot reaches light.
What pests and diseases attack tomato?
The ones covered in this guide are Alternaria leaf blight, Anthracnose, Aphids. Each has its own page explaining how to identify, check for and control it.